 |
| Exploring Microsoft Word Start Screen |
Introduction
The Microsoft Word Start Screen is the gateway to creating documents and managing projects efficiently. In this post, we’ll take a closer look at the features of the Start Screen. Whether you’re a seasoned user or new to Word, understanding the Start Screen will help you streamline your document creation process and make the most of your writing experience.
How to access the Start Screen
When we launch our version of Microsoft Word, the Start Screen also known as Backstage View appears.
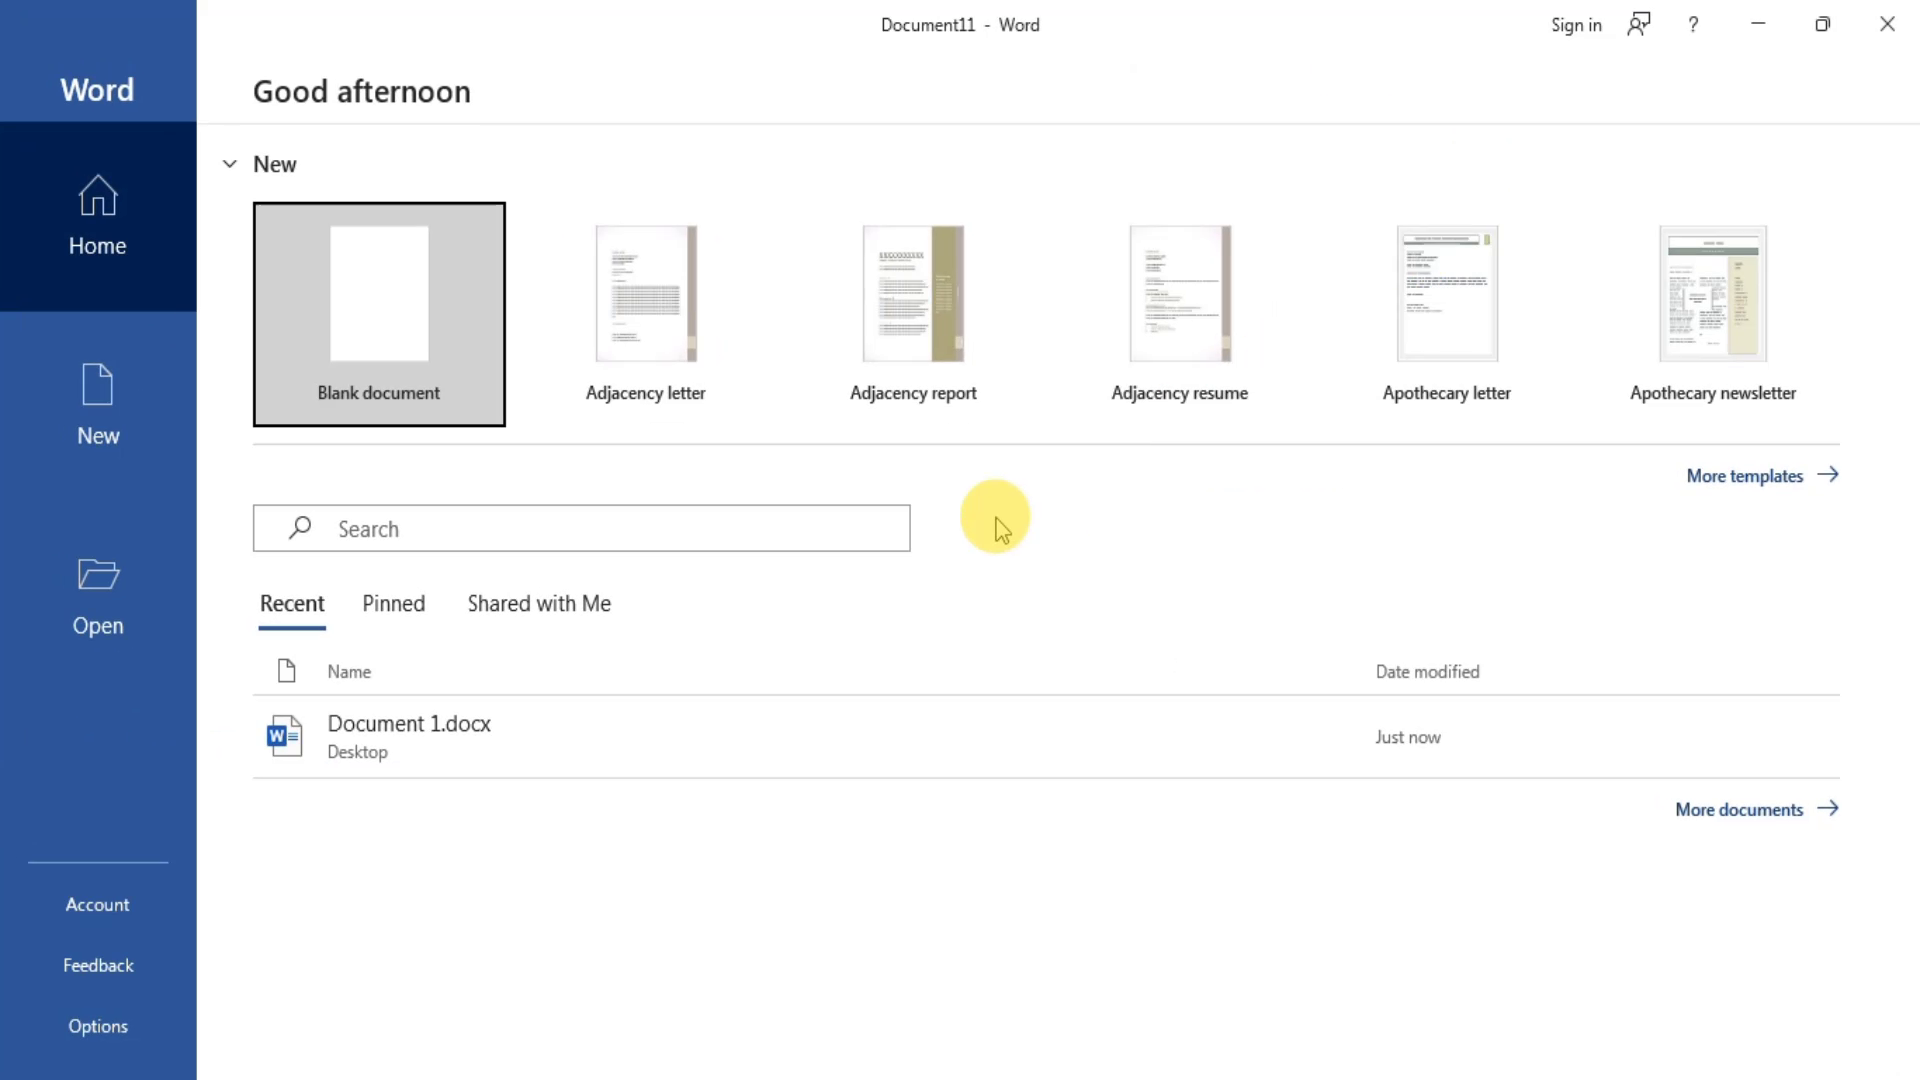 |
| The Start Screen |
What is the Start Screen
The Start Screen is designed to help us quickly start and manage our projects and documents. On this screen and in the Navigation Pane to the left side of the screen, several buttons like Home , New, and Options exist.
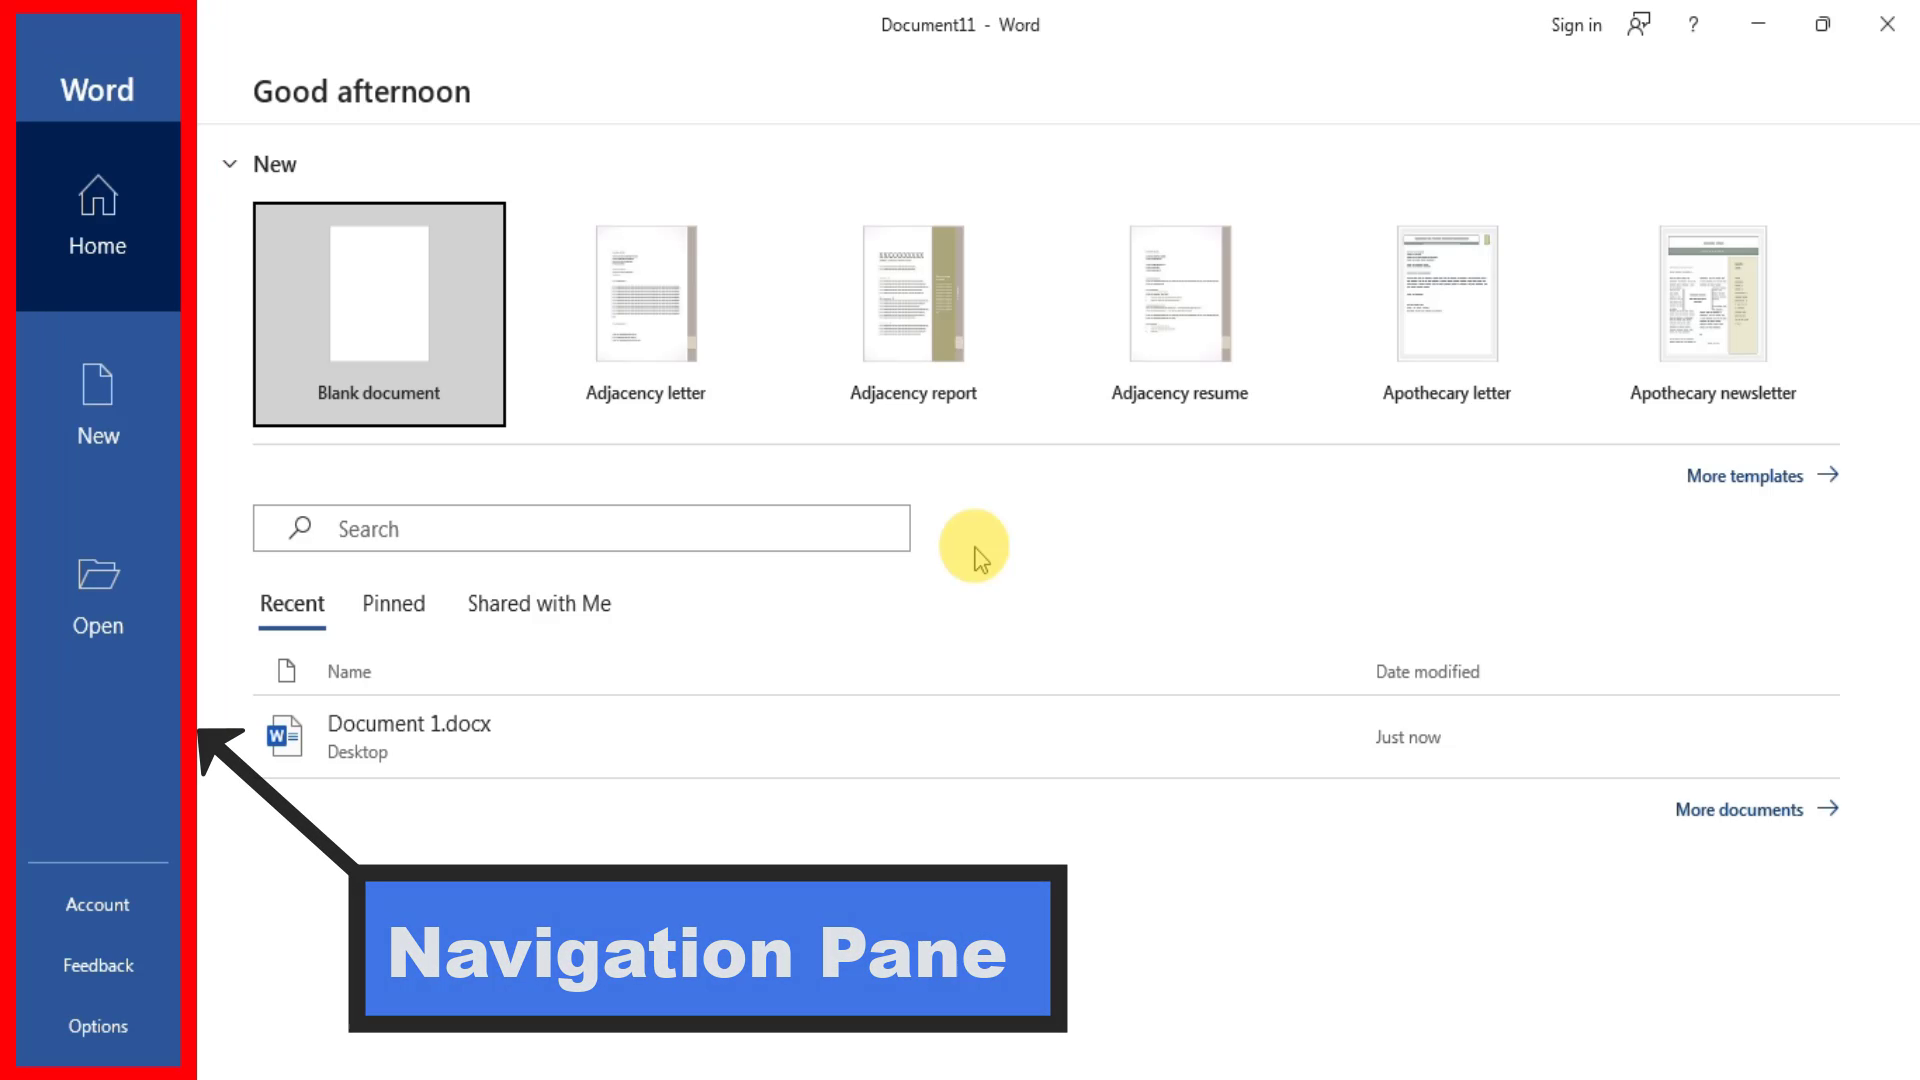 |
| Navigation Pane |
Start Screen Components
Let’s break down the components of the Start Screen so we can navigate it like a pro.
The Home Screen
When the Home button is clicked, the Home Screen appears.
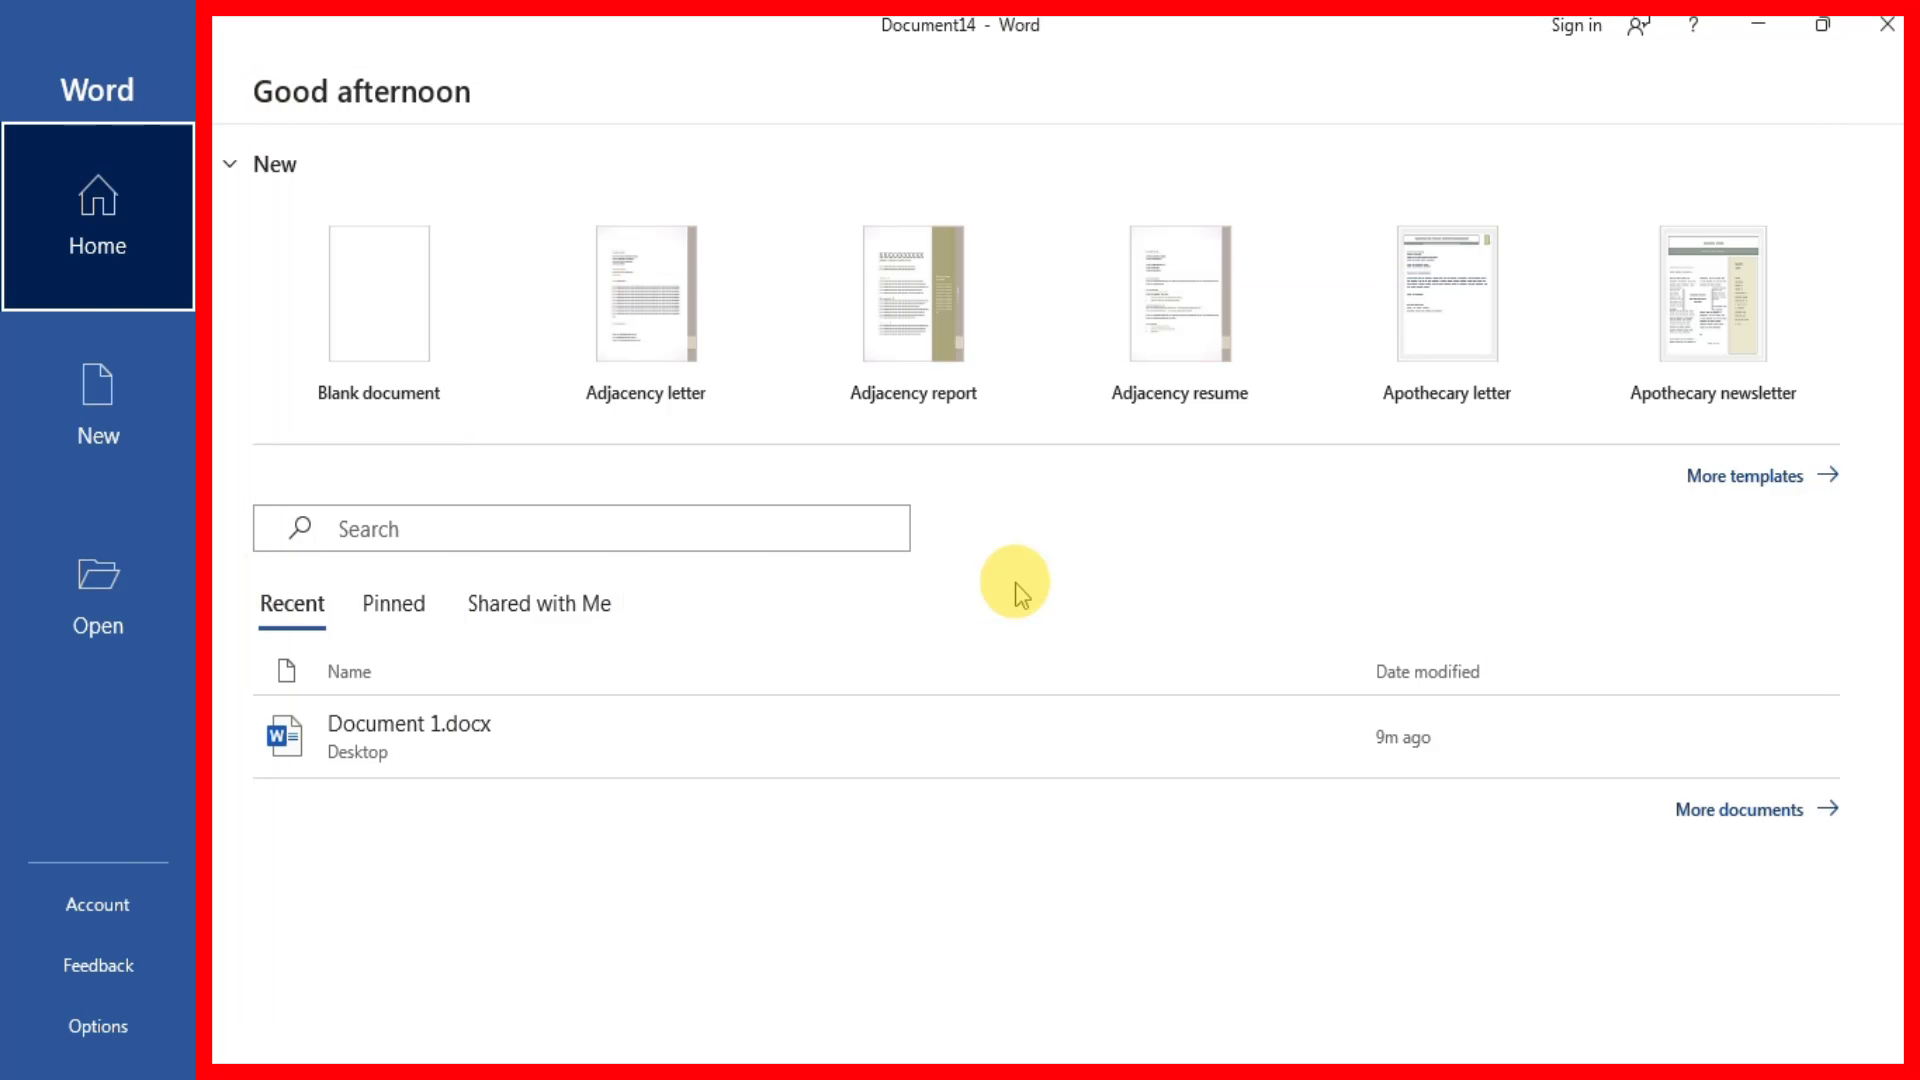 |
| The Home Screen |
On this screen, under New, clicking Blank document creates an empty Microsoft Word document. To the right of that button, some templates and tutorials are shown. We can click on any of these to get going.
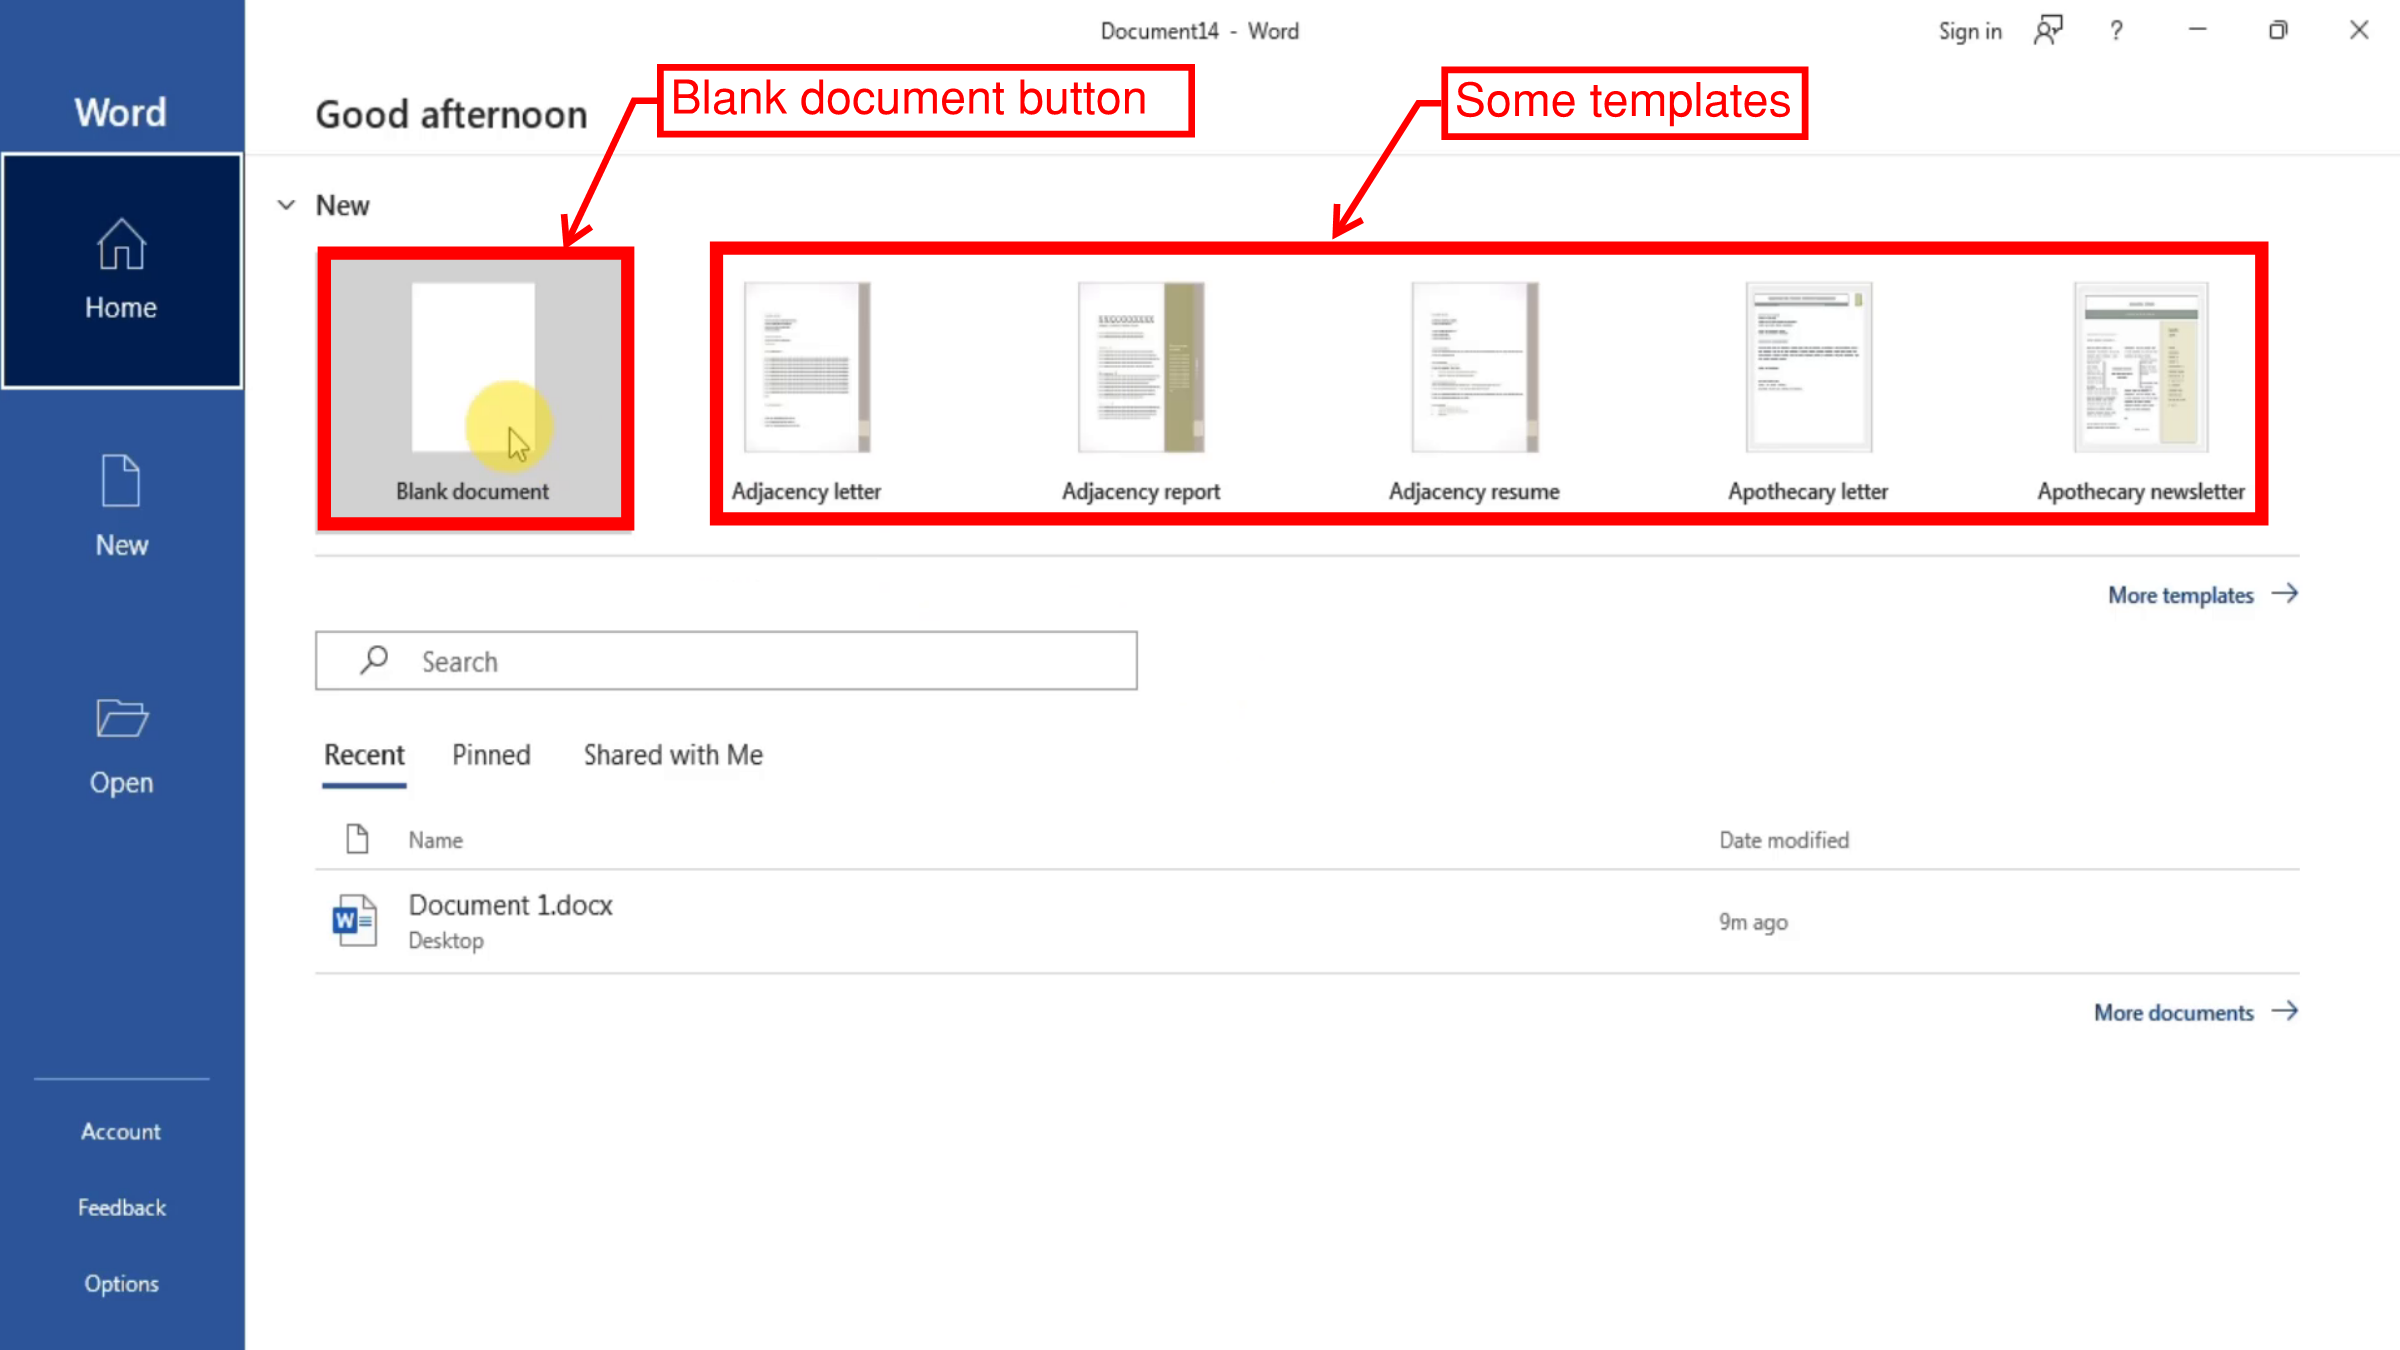 |
| The Blank document button | | | | | | | | | | | | | |
The
Home screen also includes a
Recent section, which displays the documents we've recently opened. To open any of the word documents listed in the
Recent section, click on it. When we hover over a document, we see options such as
Pin and
Share. Pinning a document keeps it accessible as it will be listed under the
Pinned section while clicking on
Share provides sharing options via our Office account. The documents shared with us via our account will appear under the
Shared with Me section. To unpin a document, simply click on the
Unpin button. We can use the search bar to quickly find specific documents, which is a great time-saver.
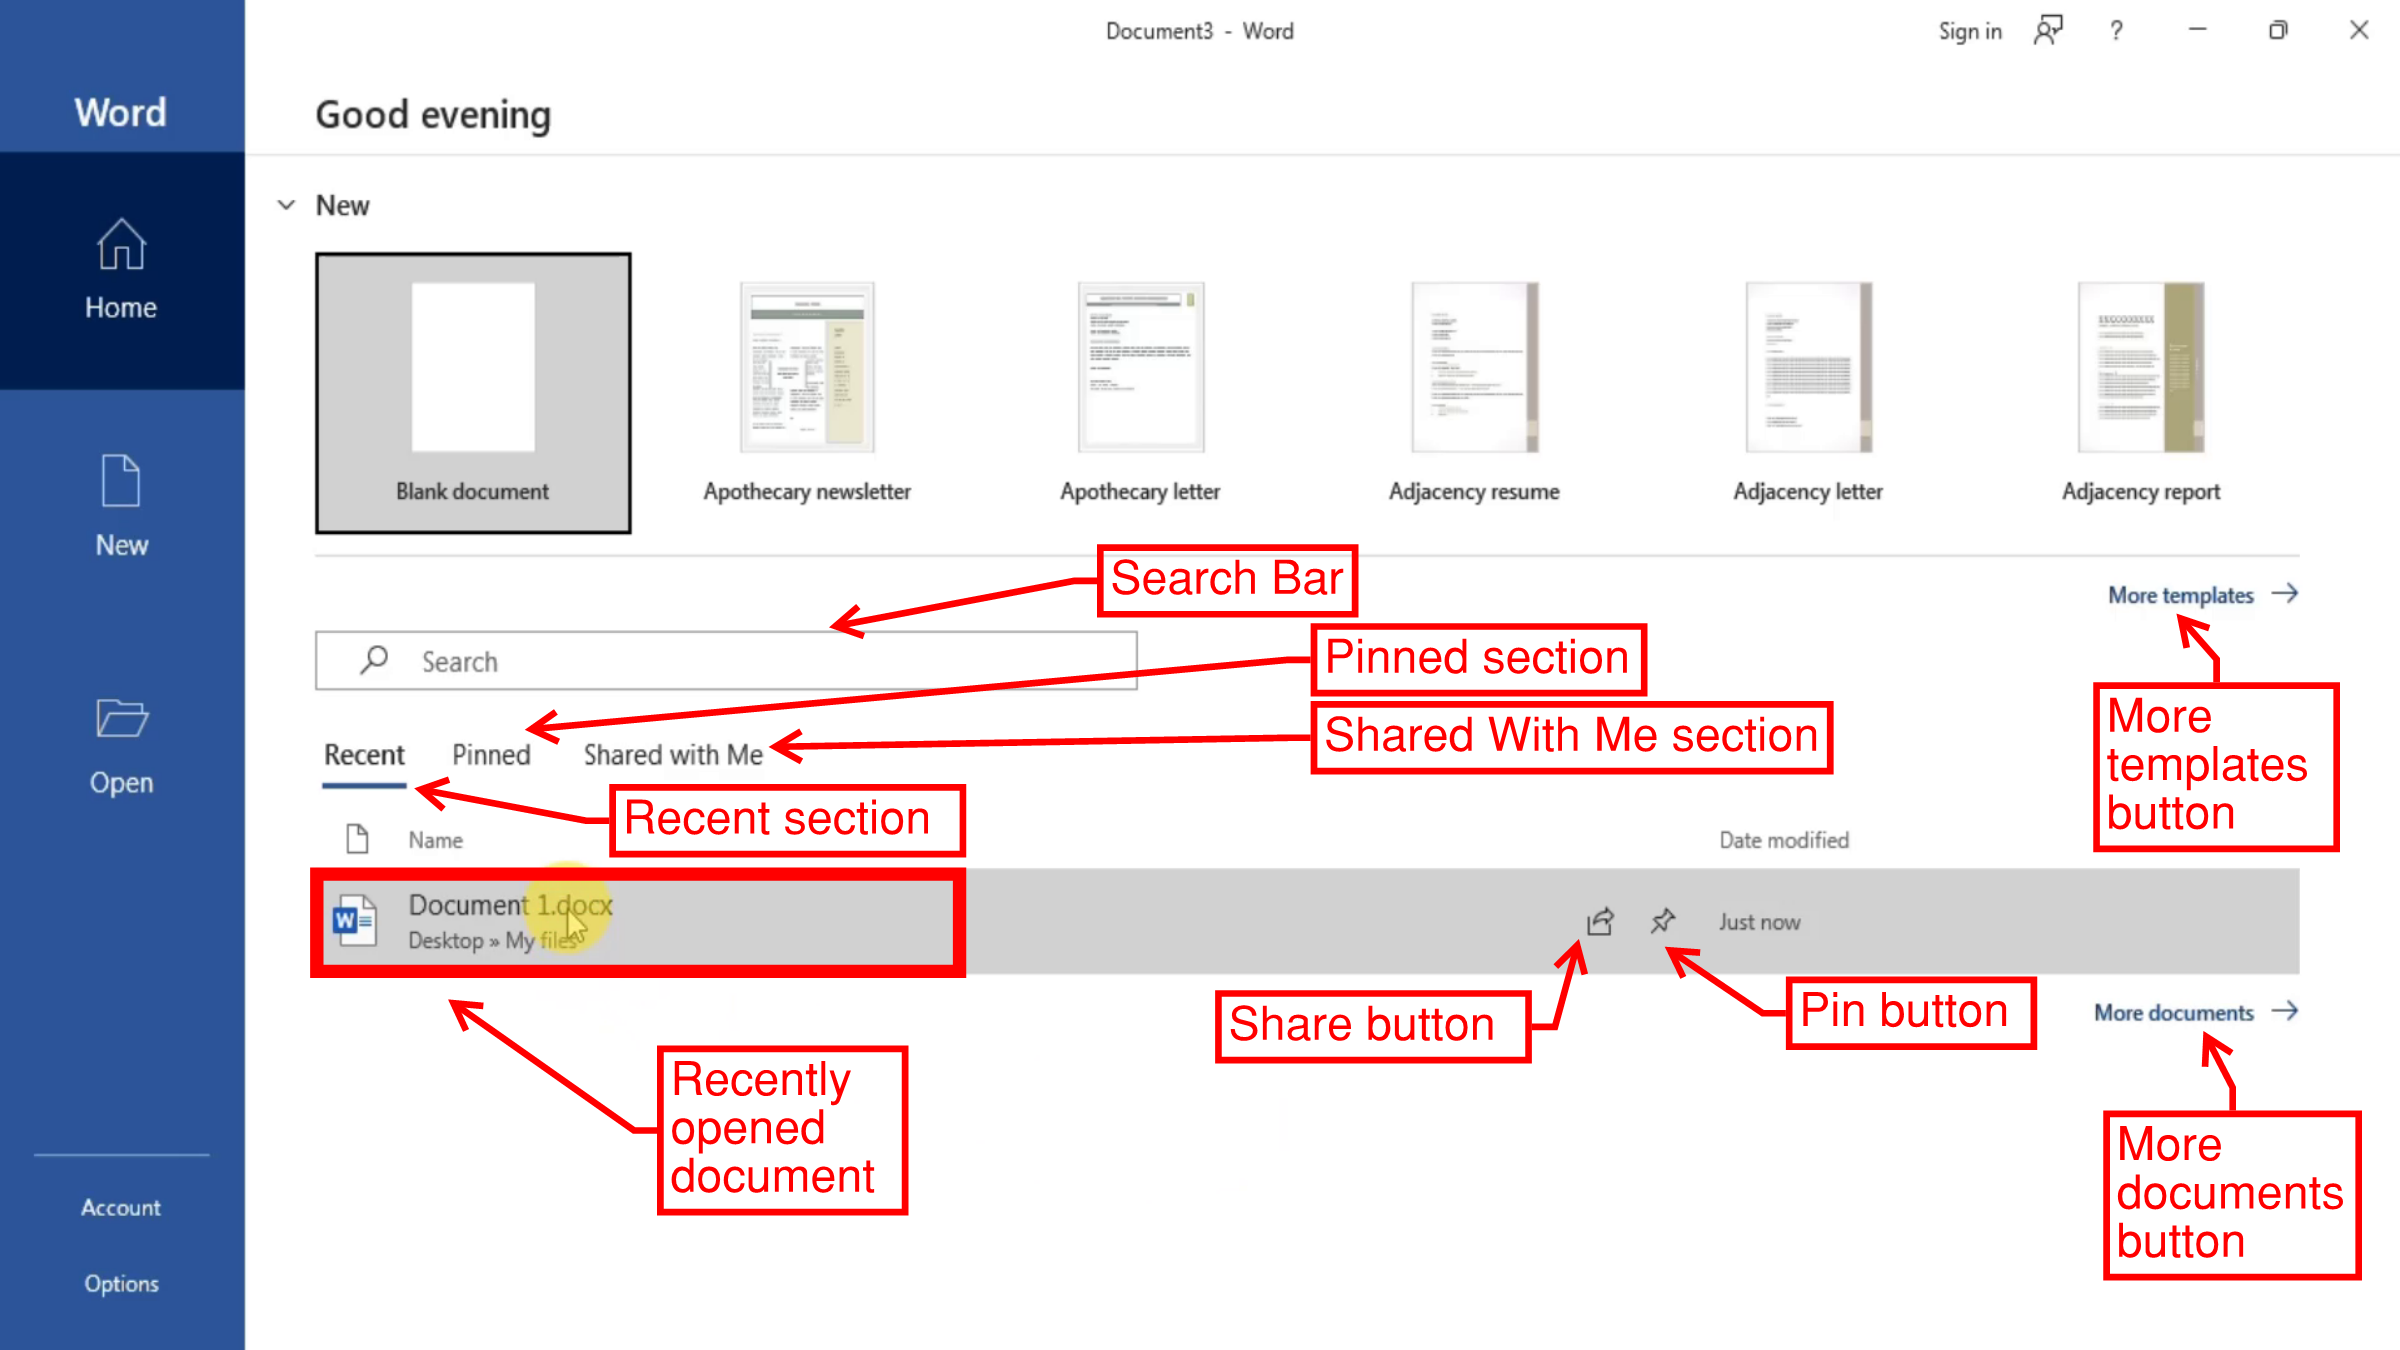 |
| The Recent section |
The New Screen
Clicking on the New button or clicking on the More templates button in the Home screen takes us to the New Documents screen. Clicking on Blank Document creates an empty Word document. Microsoft offers several free templates for us to use. We can also search for a template to match our needs using the search bar. The templates offered by Microsoft cover a wide range of document types Microsoft Word is used for, such as reports, invoices, flyers and so on. Once we know which template we want to use, click on it to create a document based on that template and edit it.
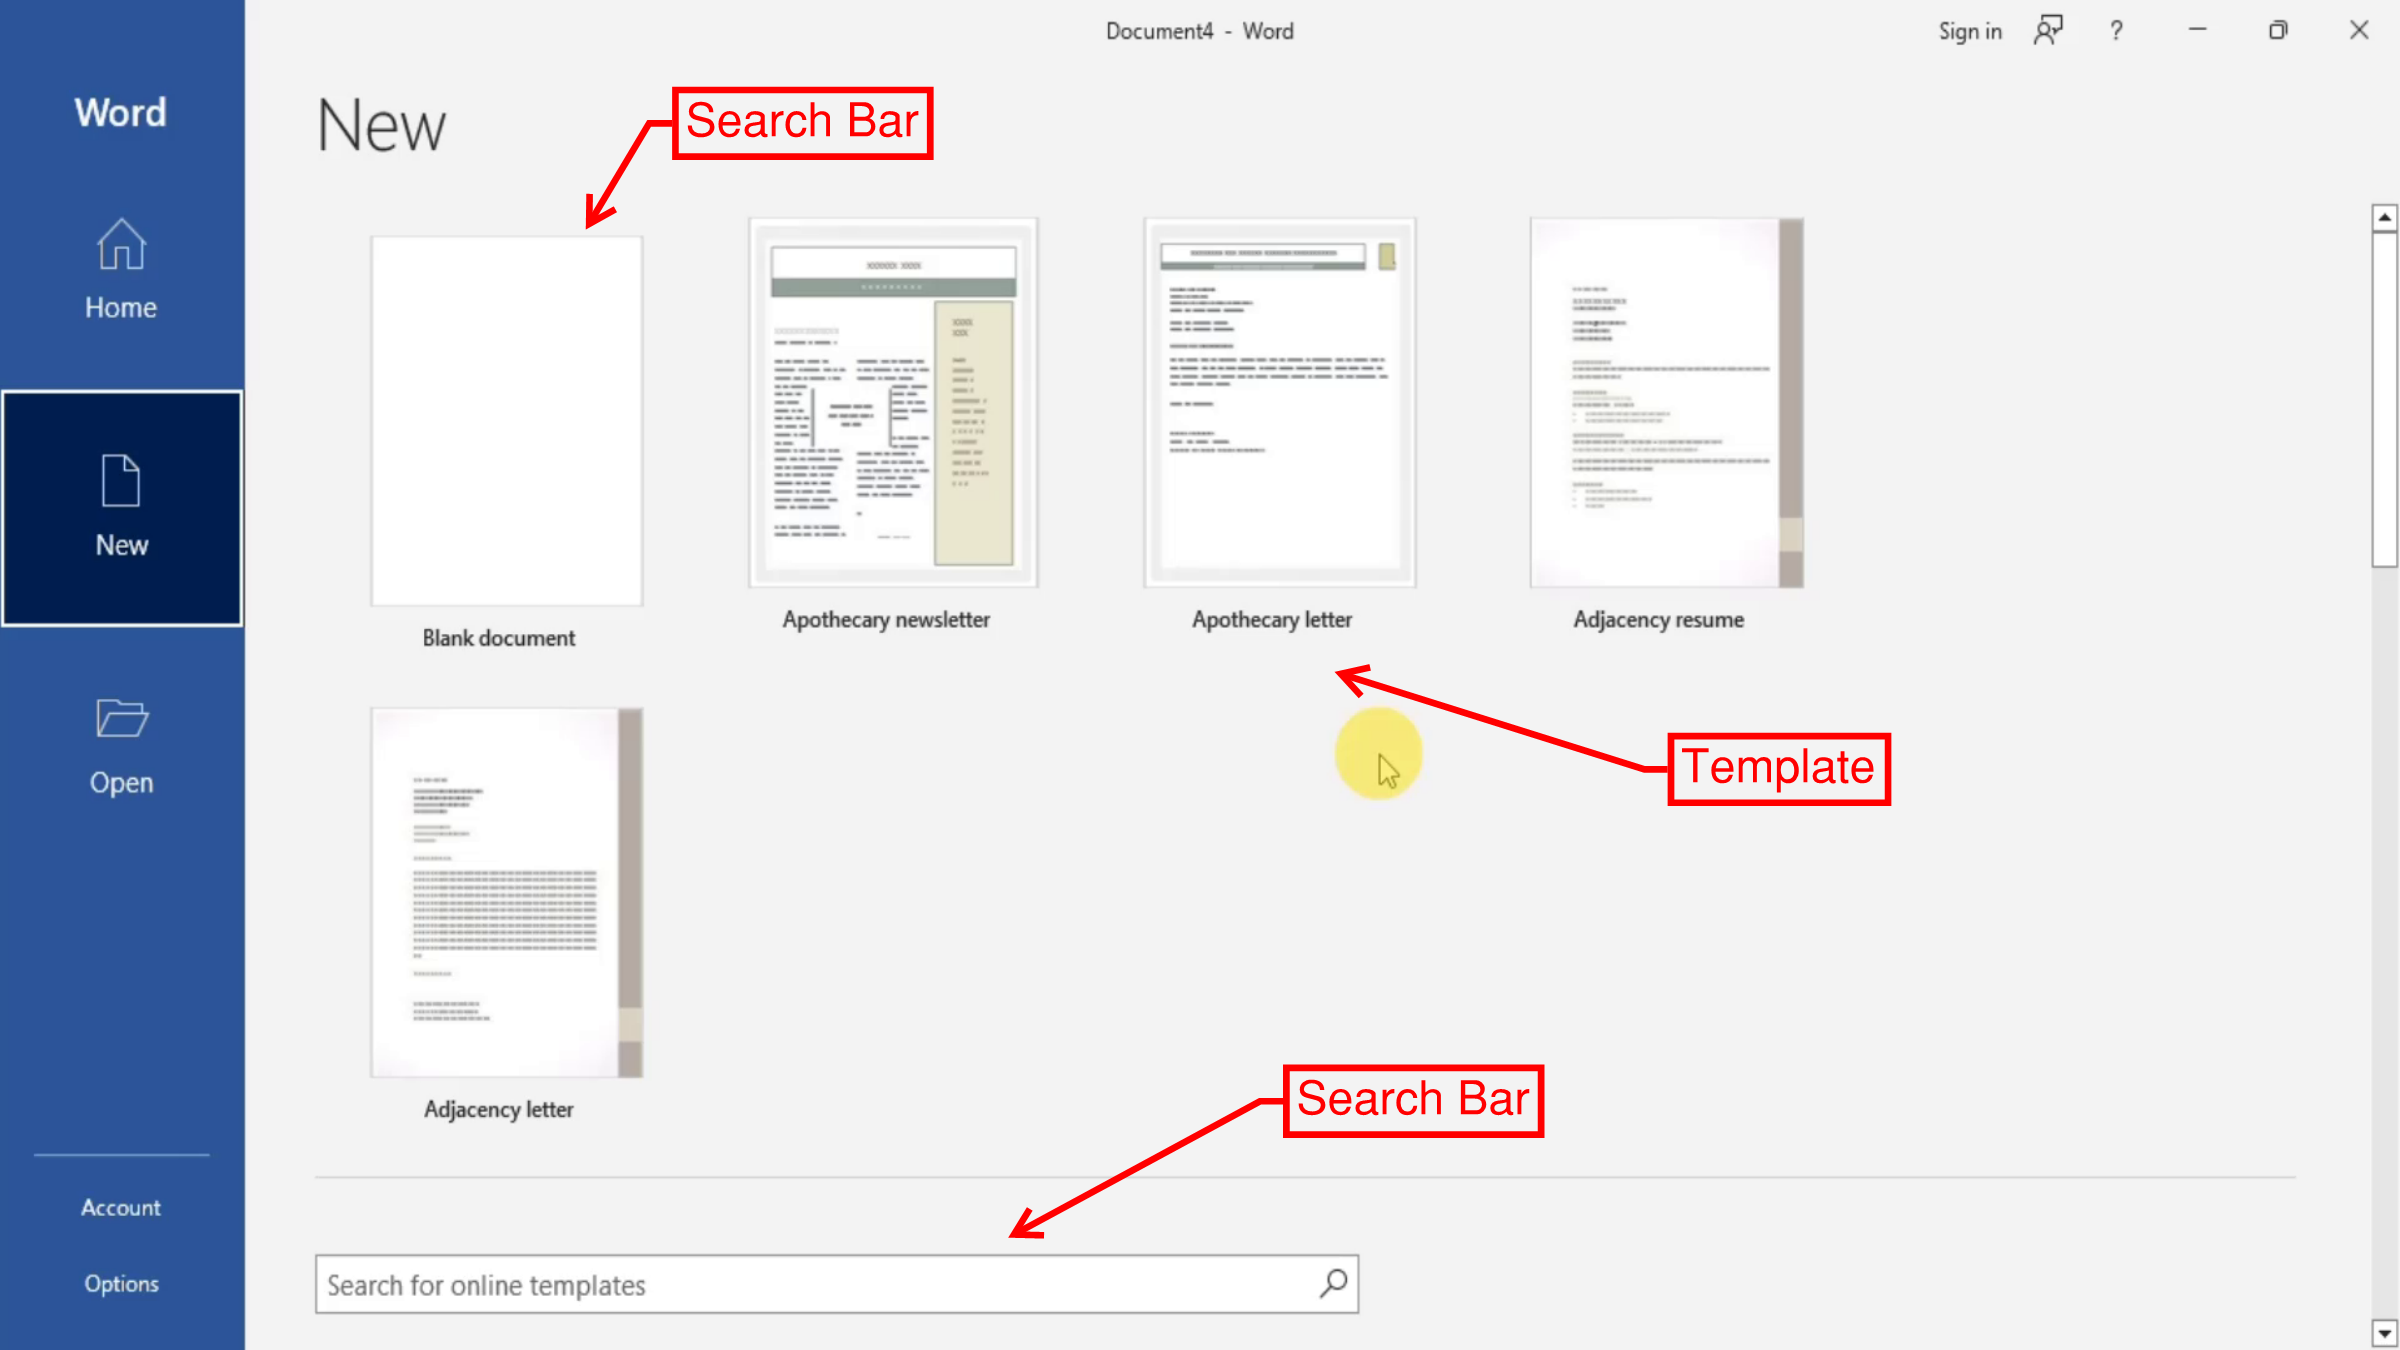 |
| New Documents Screen |
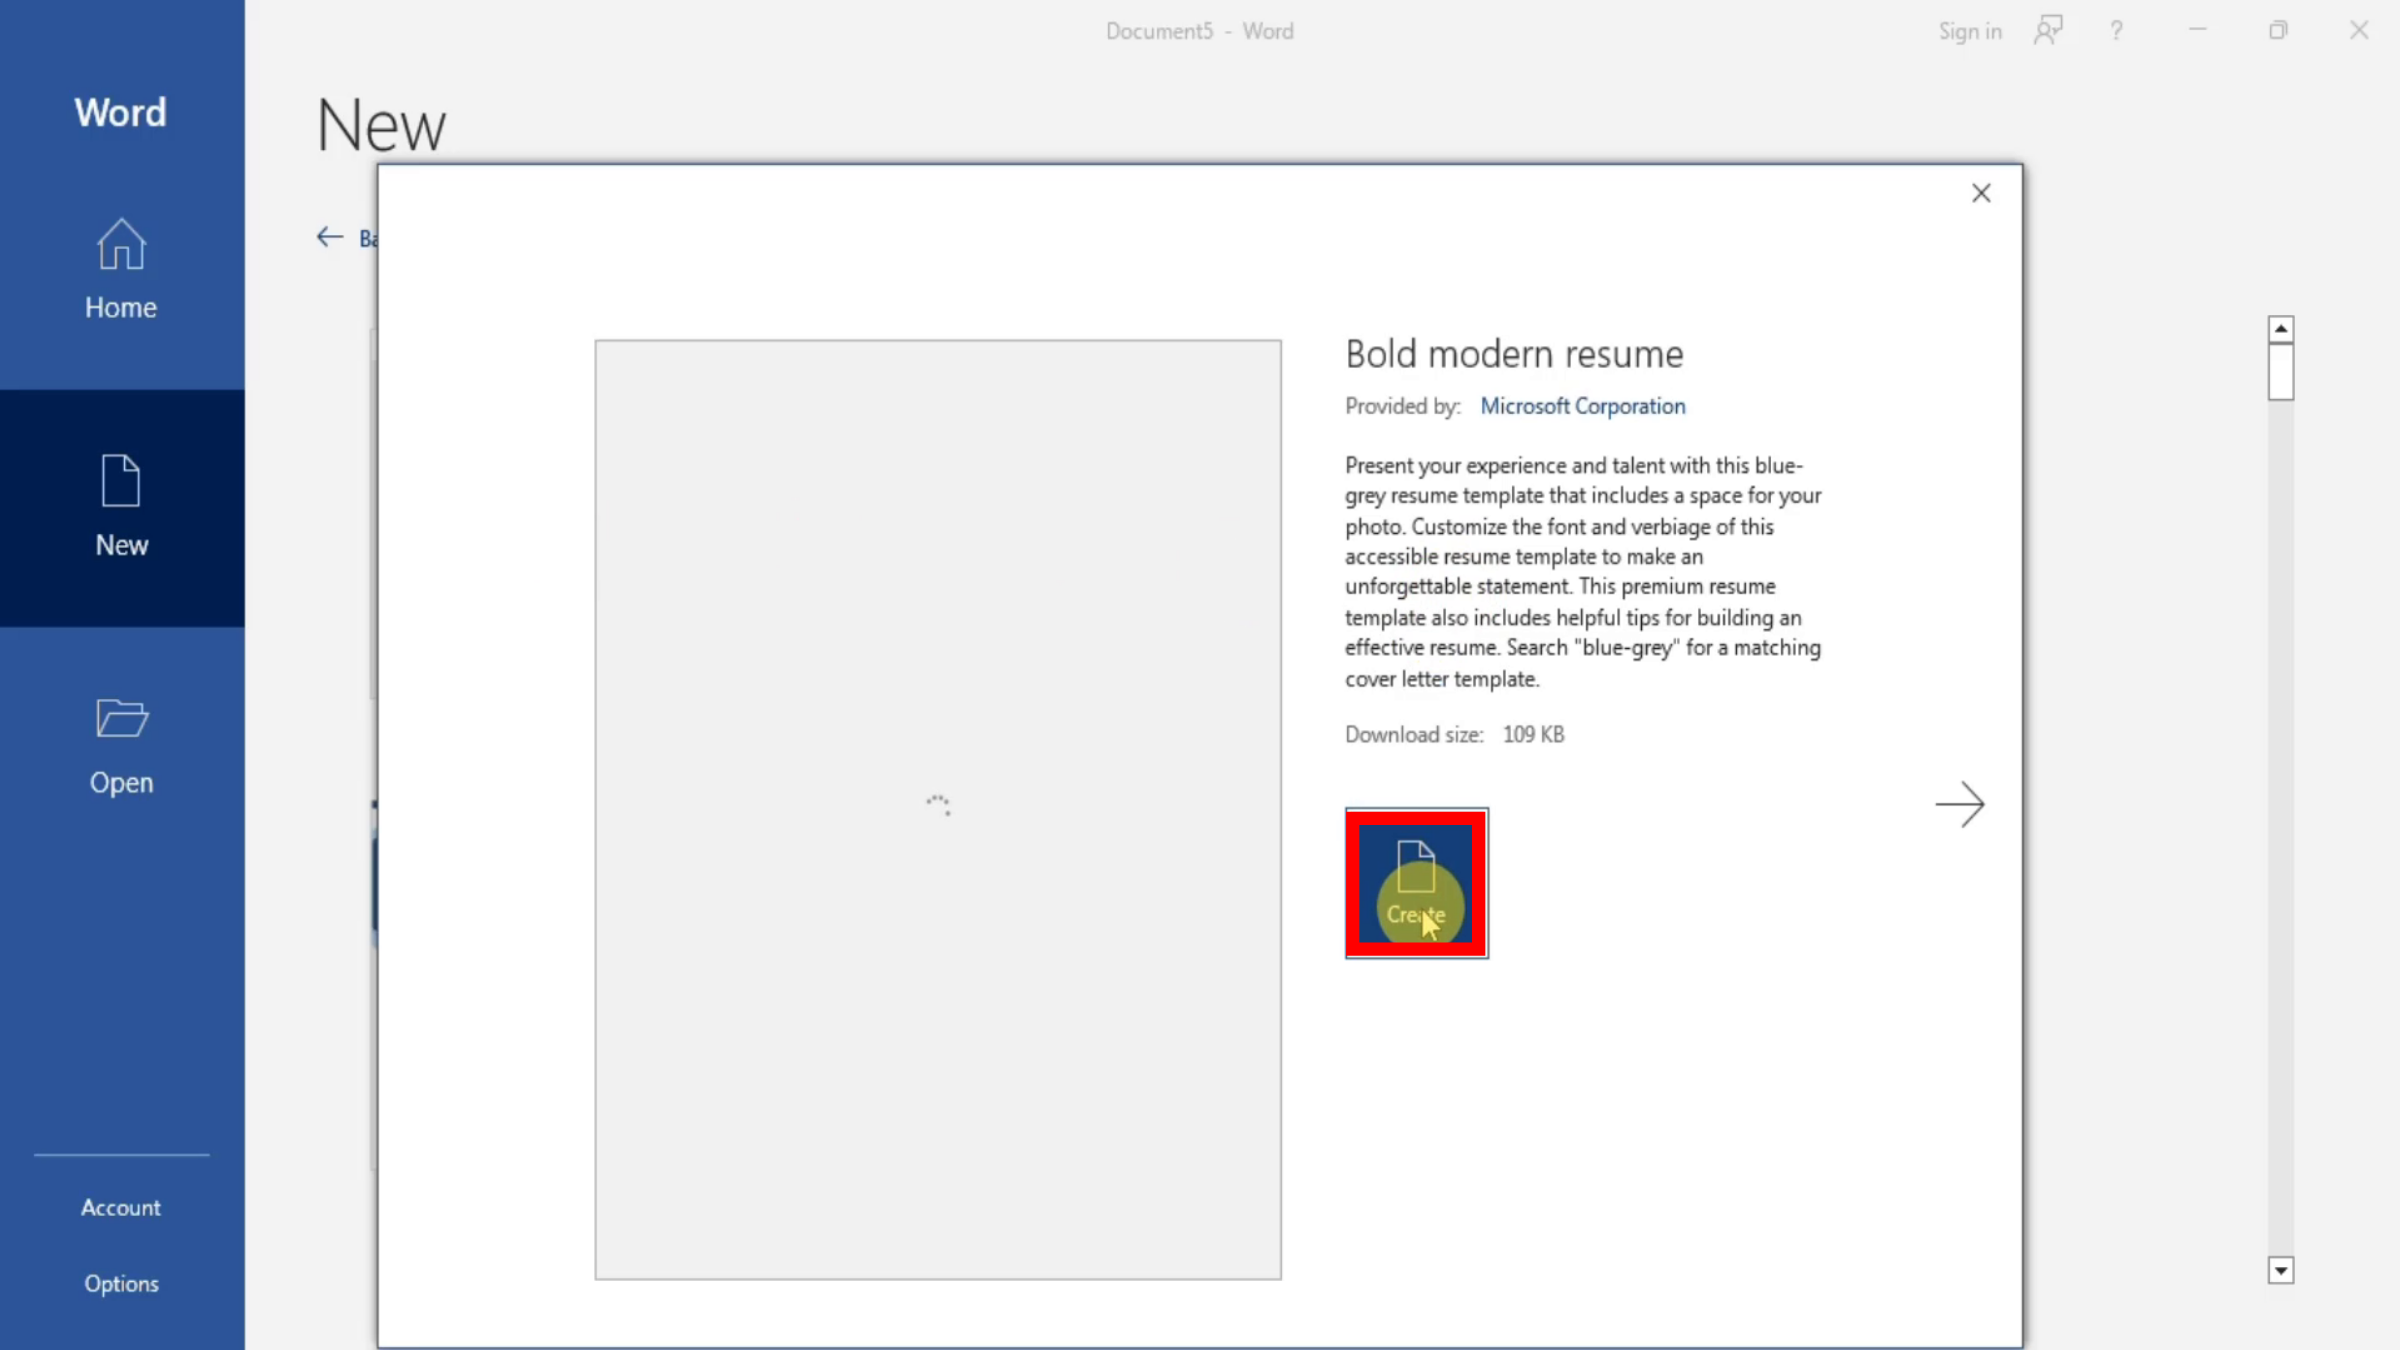 |
| Creating a document based on a template |
The Open Screen
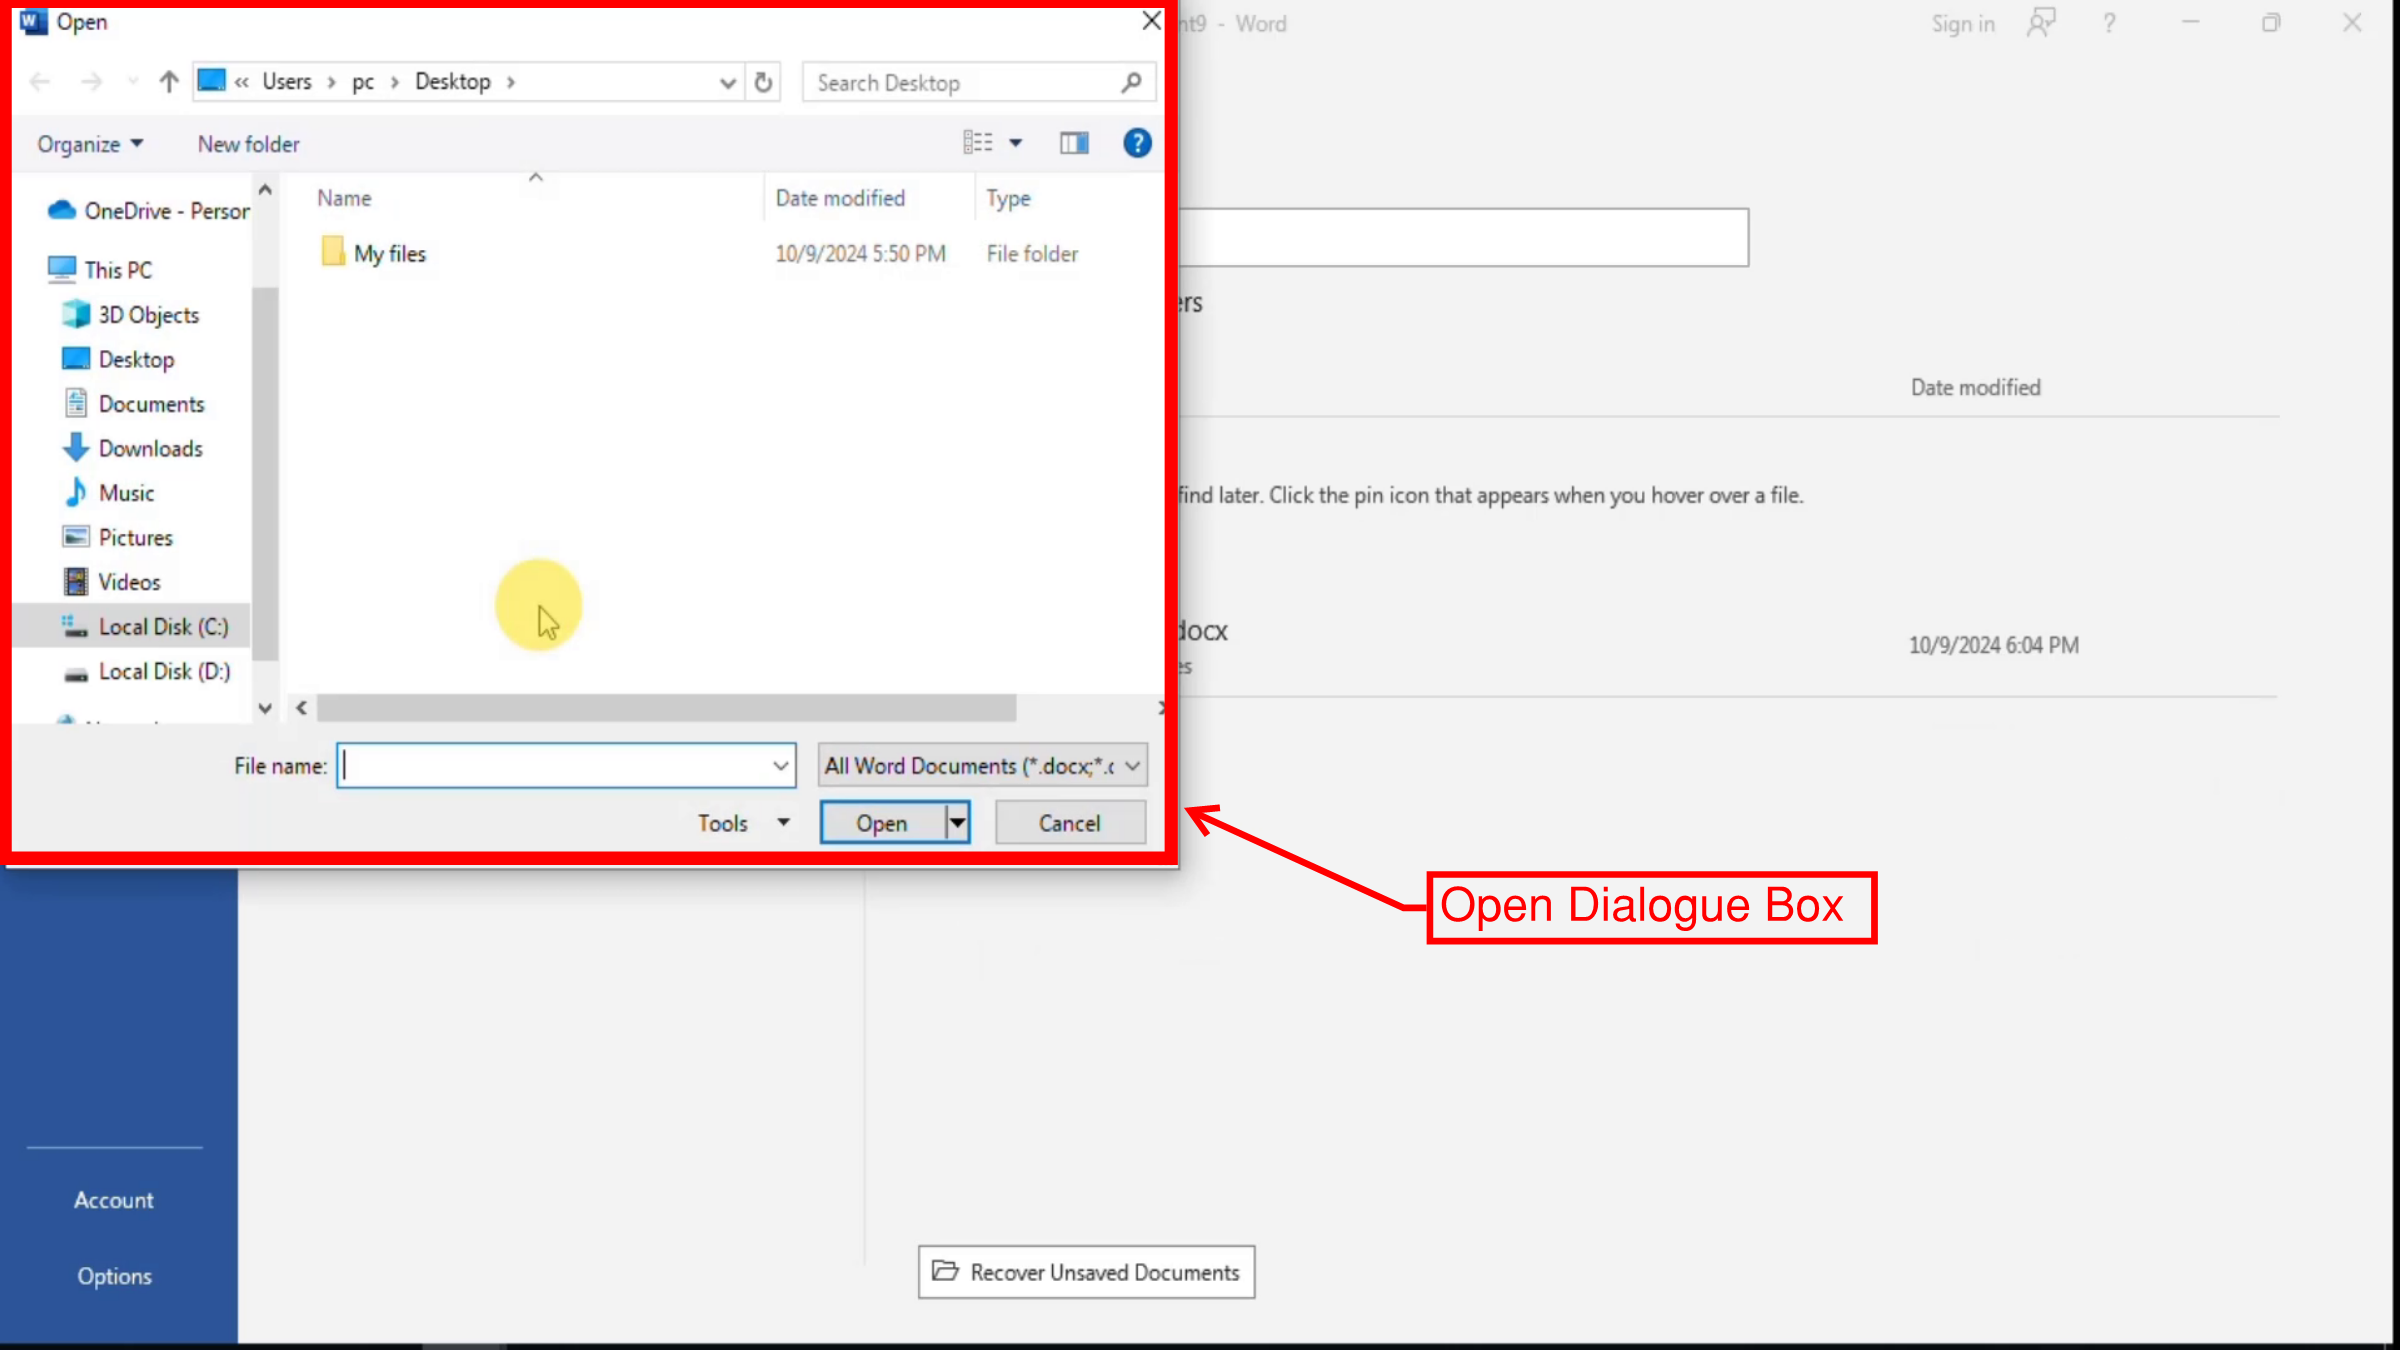
Clicking on the Open button or clicking on the More documents button in the Home screen takes us to the Open Documents screen. When we click on Recent , the Recent Documents section appears which shows the documents we have recently accessed sorted by date of last access. We can select whether we want to look for documents directly or to look for folders. Searching using the search bar helps us refine the results. The Recover Unsaved Documents button is an important feature that allows us to recover documents that we were editing but didn’t save. When we click on this button, an Open Dialogue Box appears in which documents that can be recovered are listed. We can select the document we want to recover to recover it.
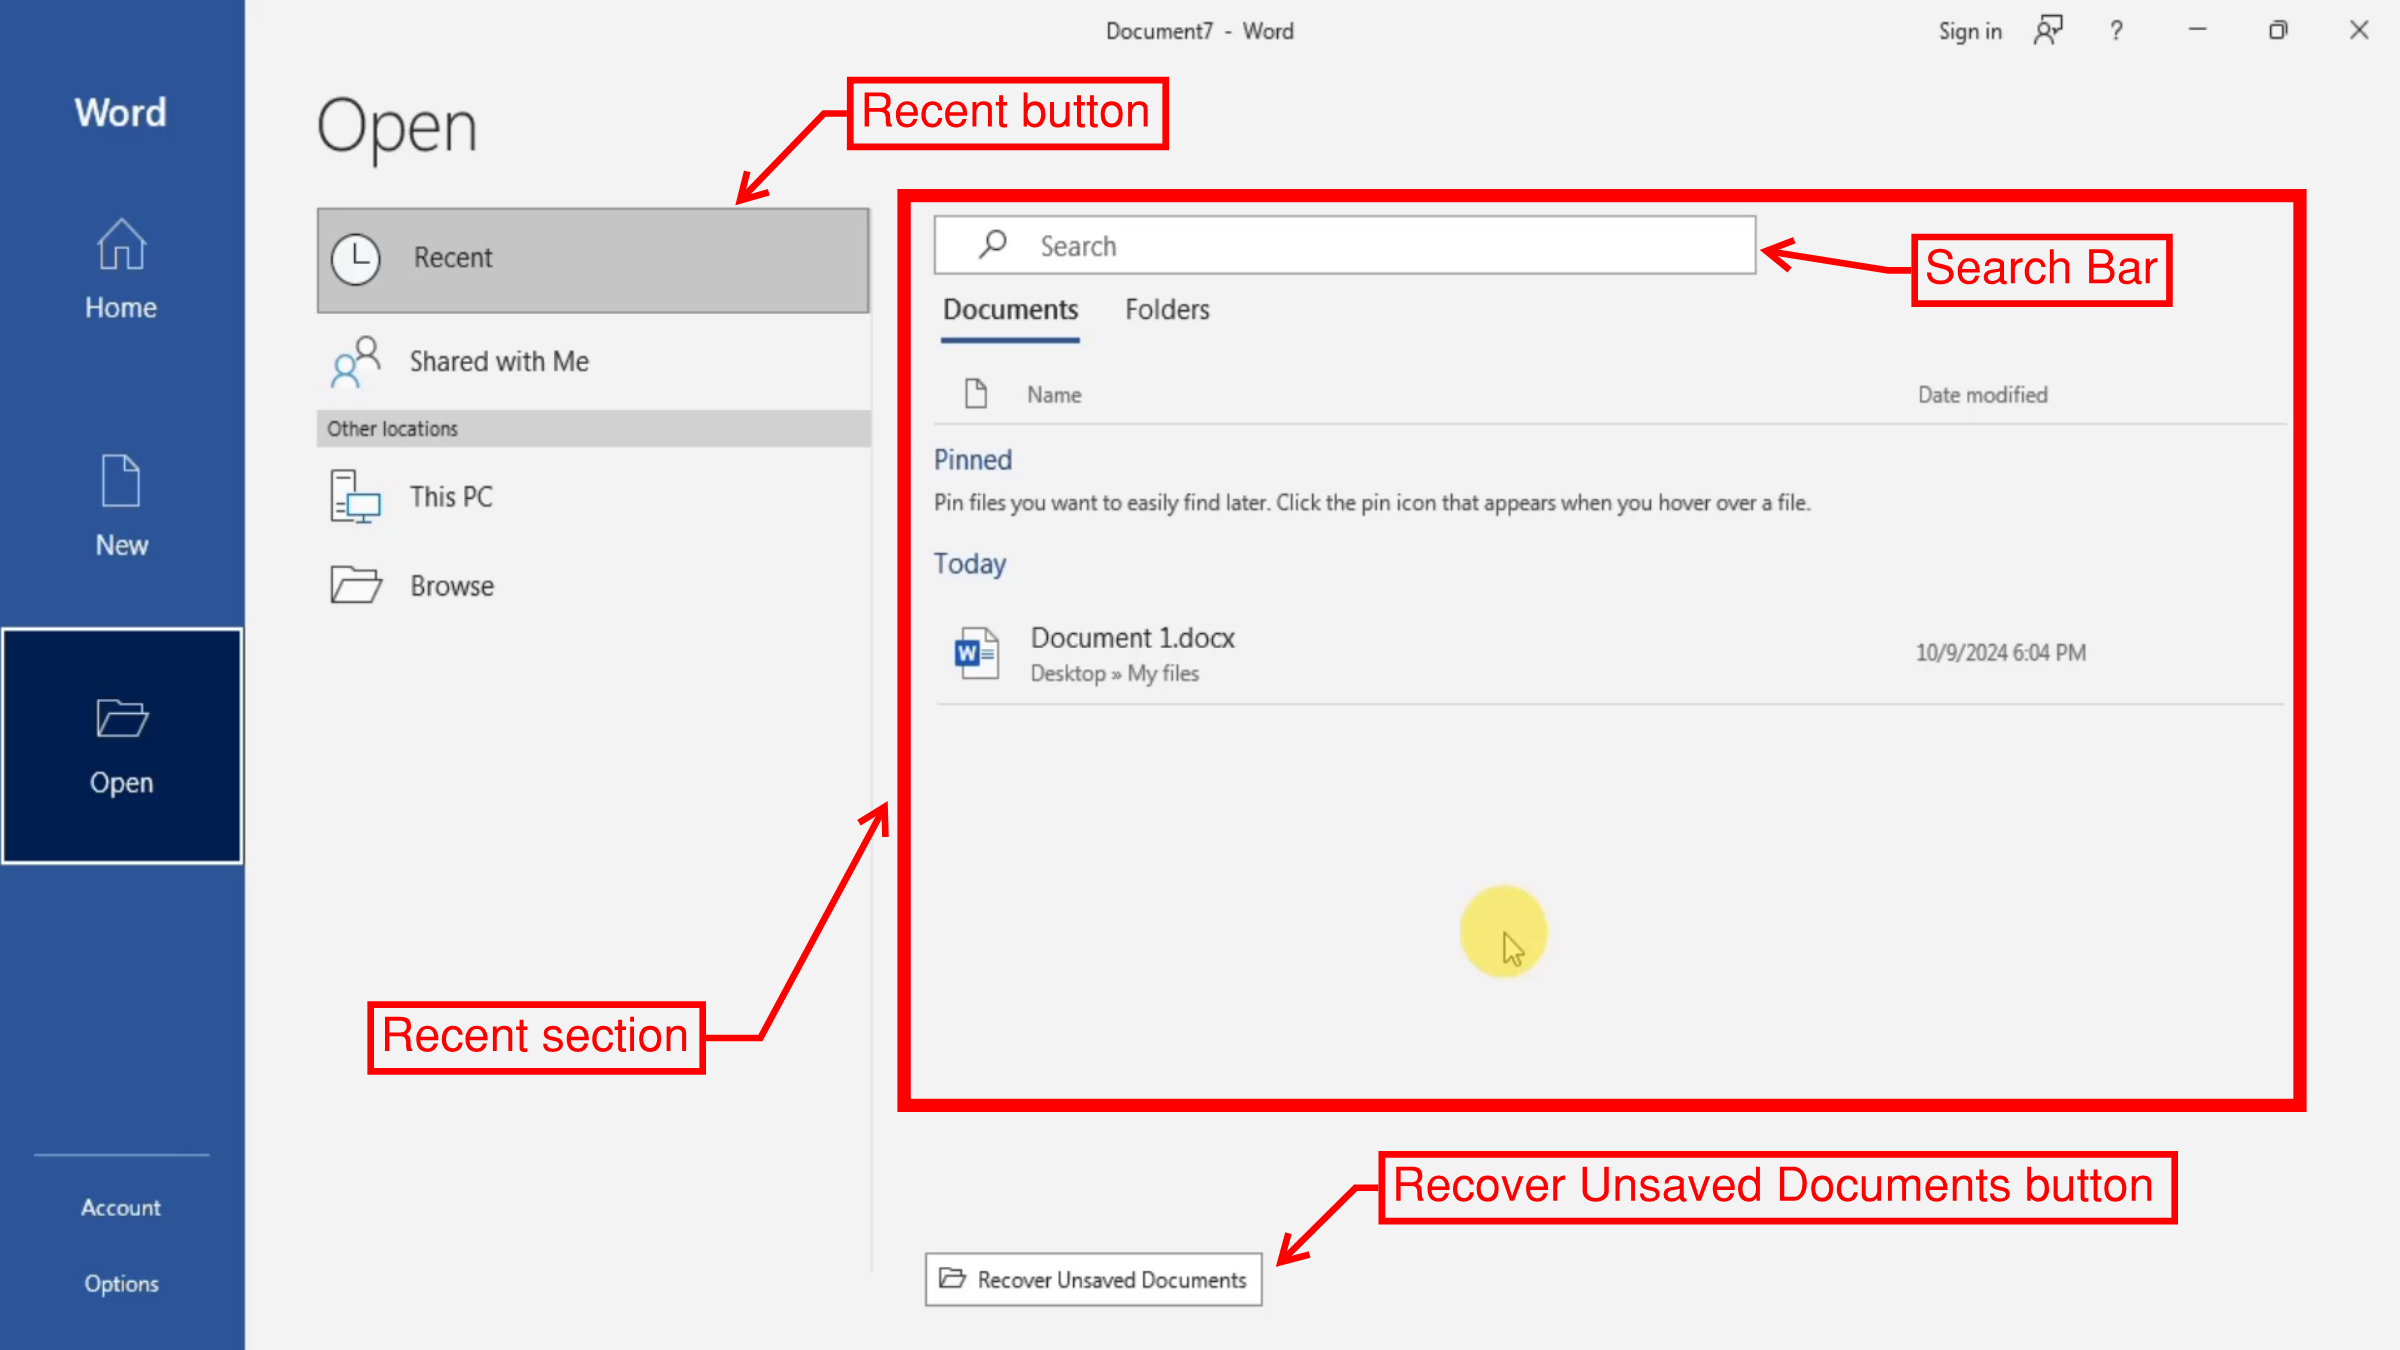 |
| Open screen- Recent section |
In the
Shared with Me section which we can access by clicking on the
Shared with Me button, a list of documents that are shared with us via our account is shown.
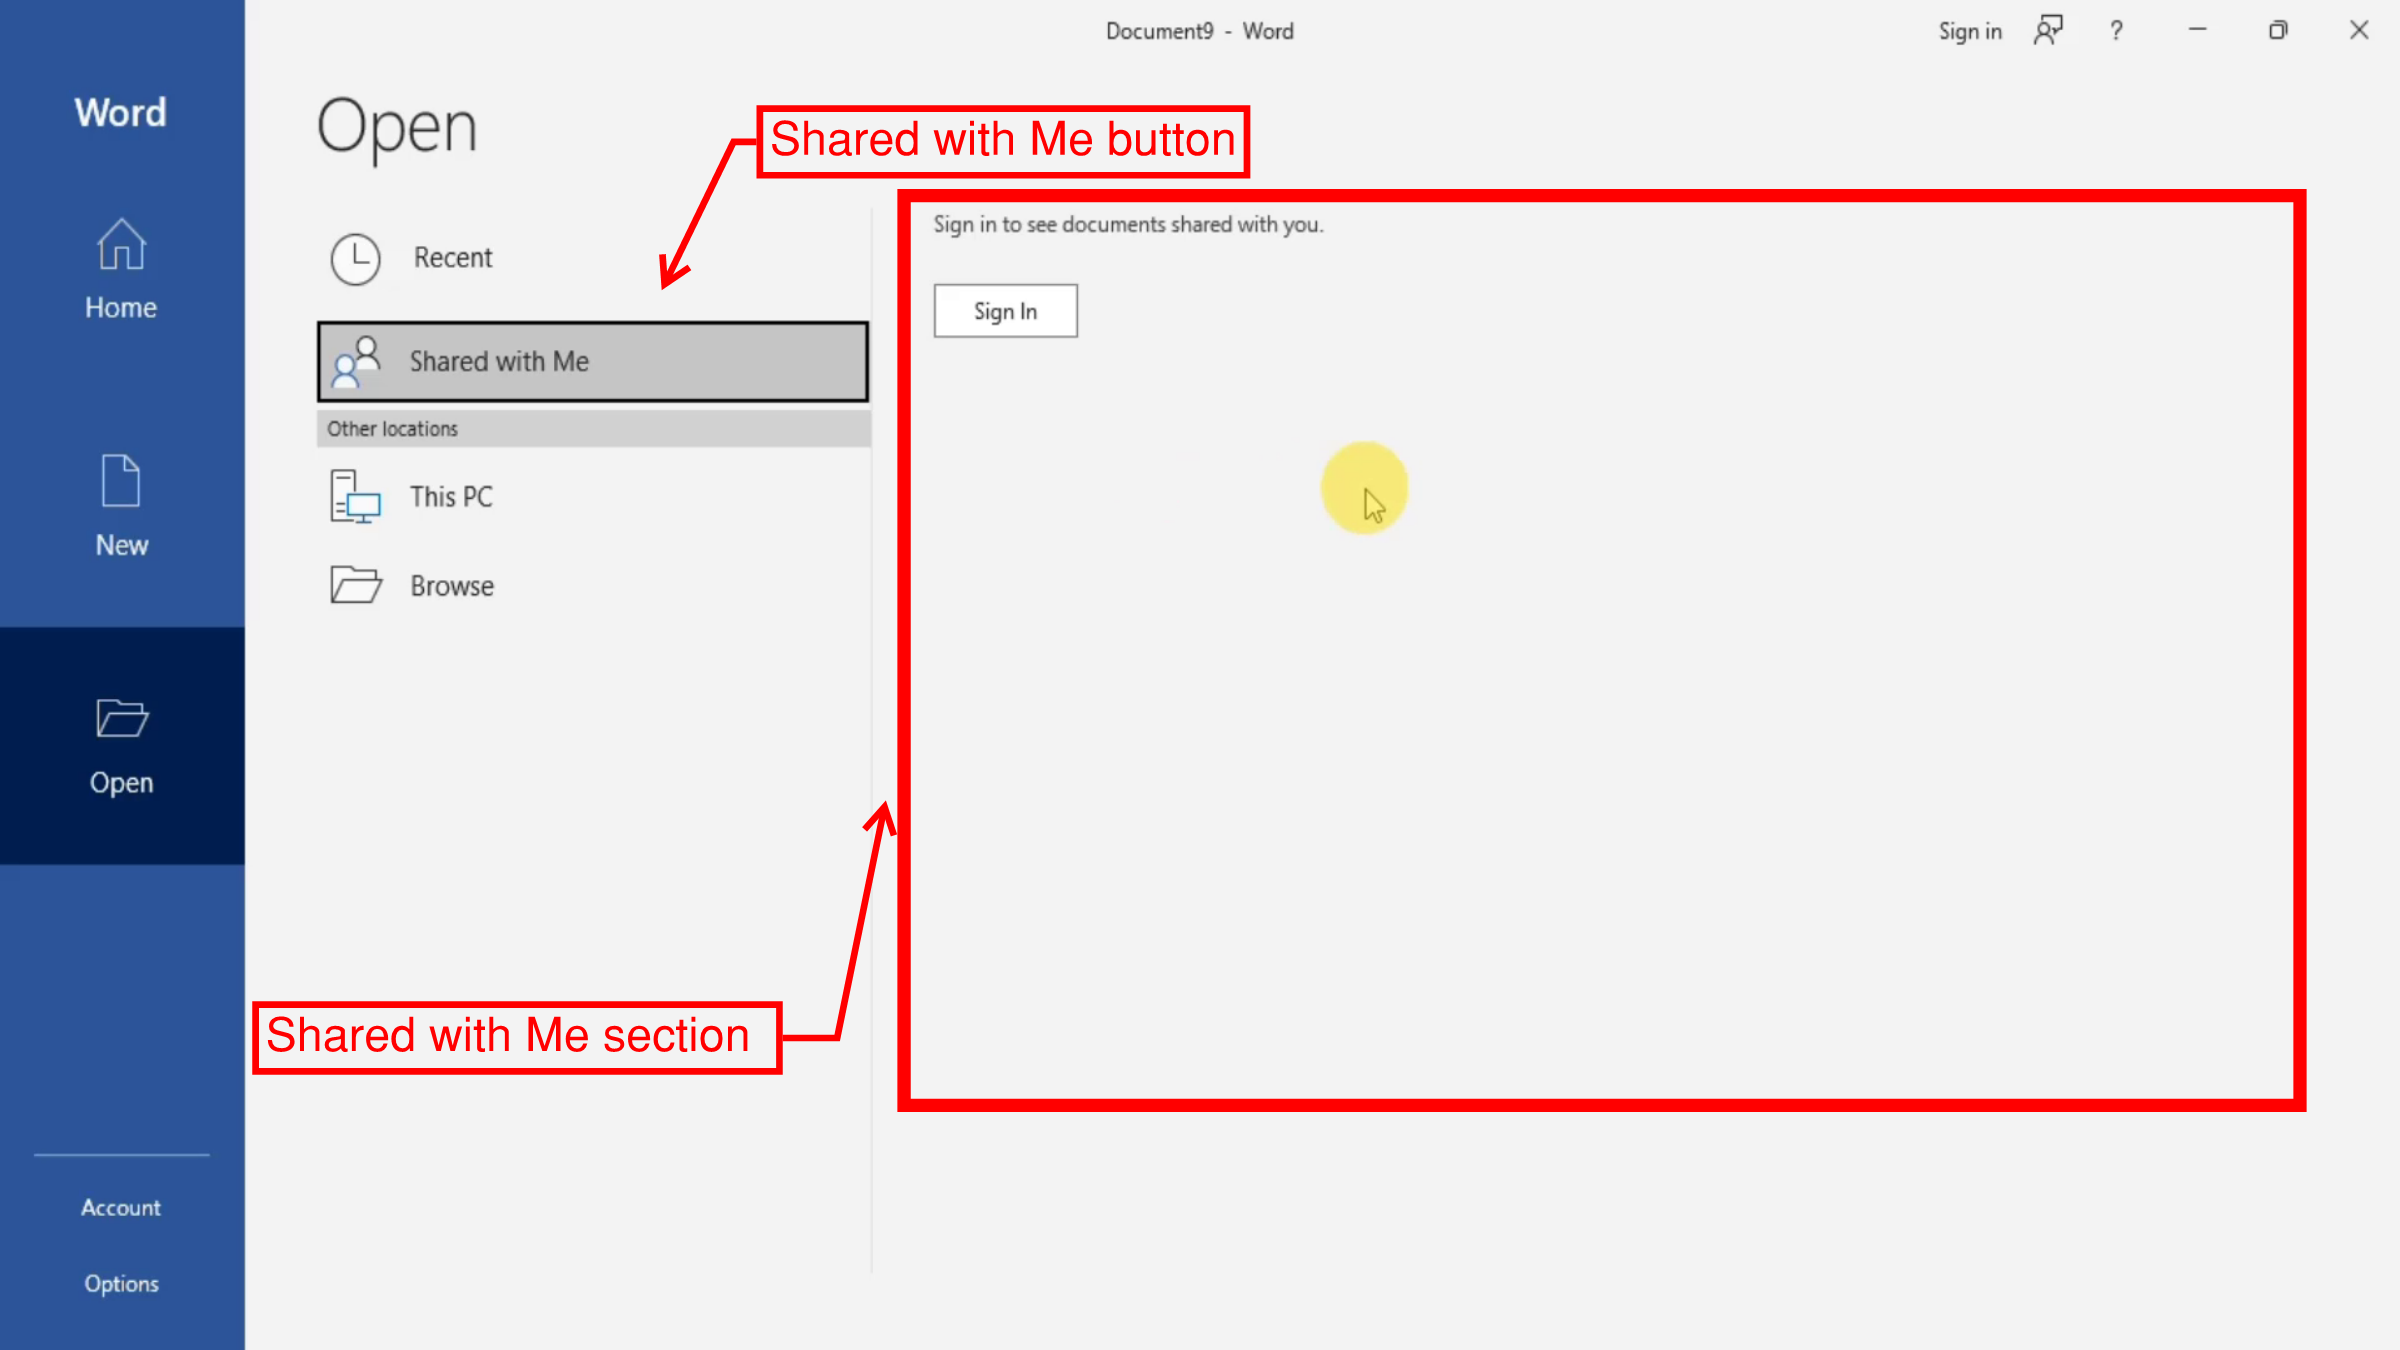 |
| Open Screen - Shared with Me section |
Clicking on the
This PC button helps us search for word documents within the
Documents folder or any other folder we want to browse to by clicking on the word
Documents.
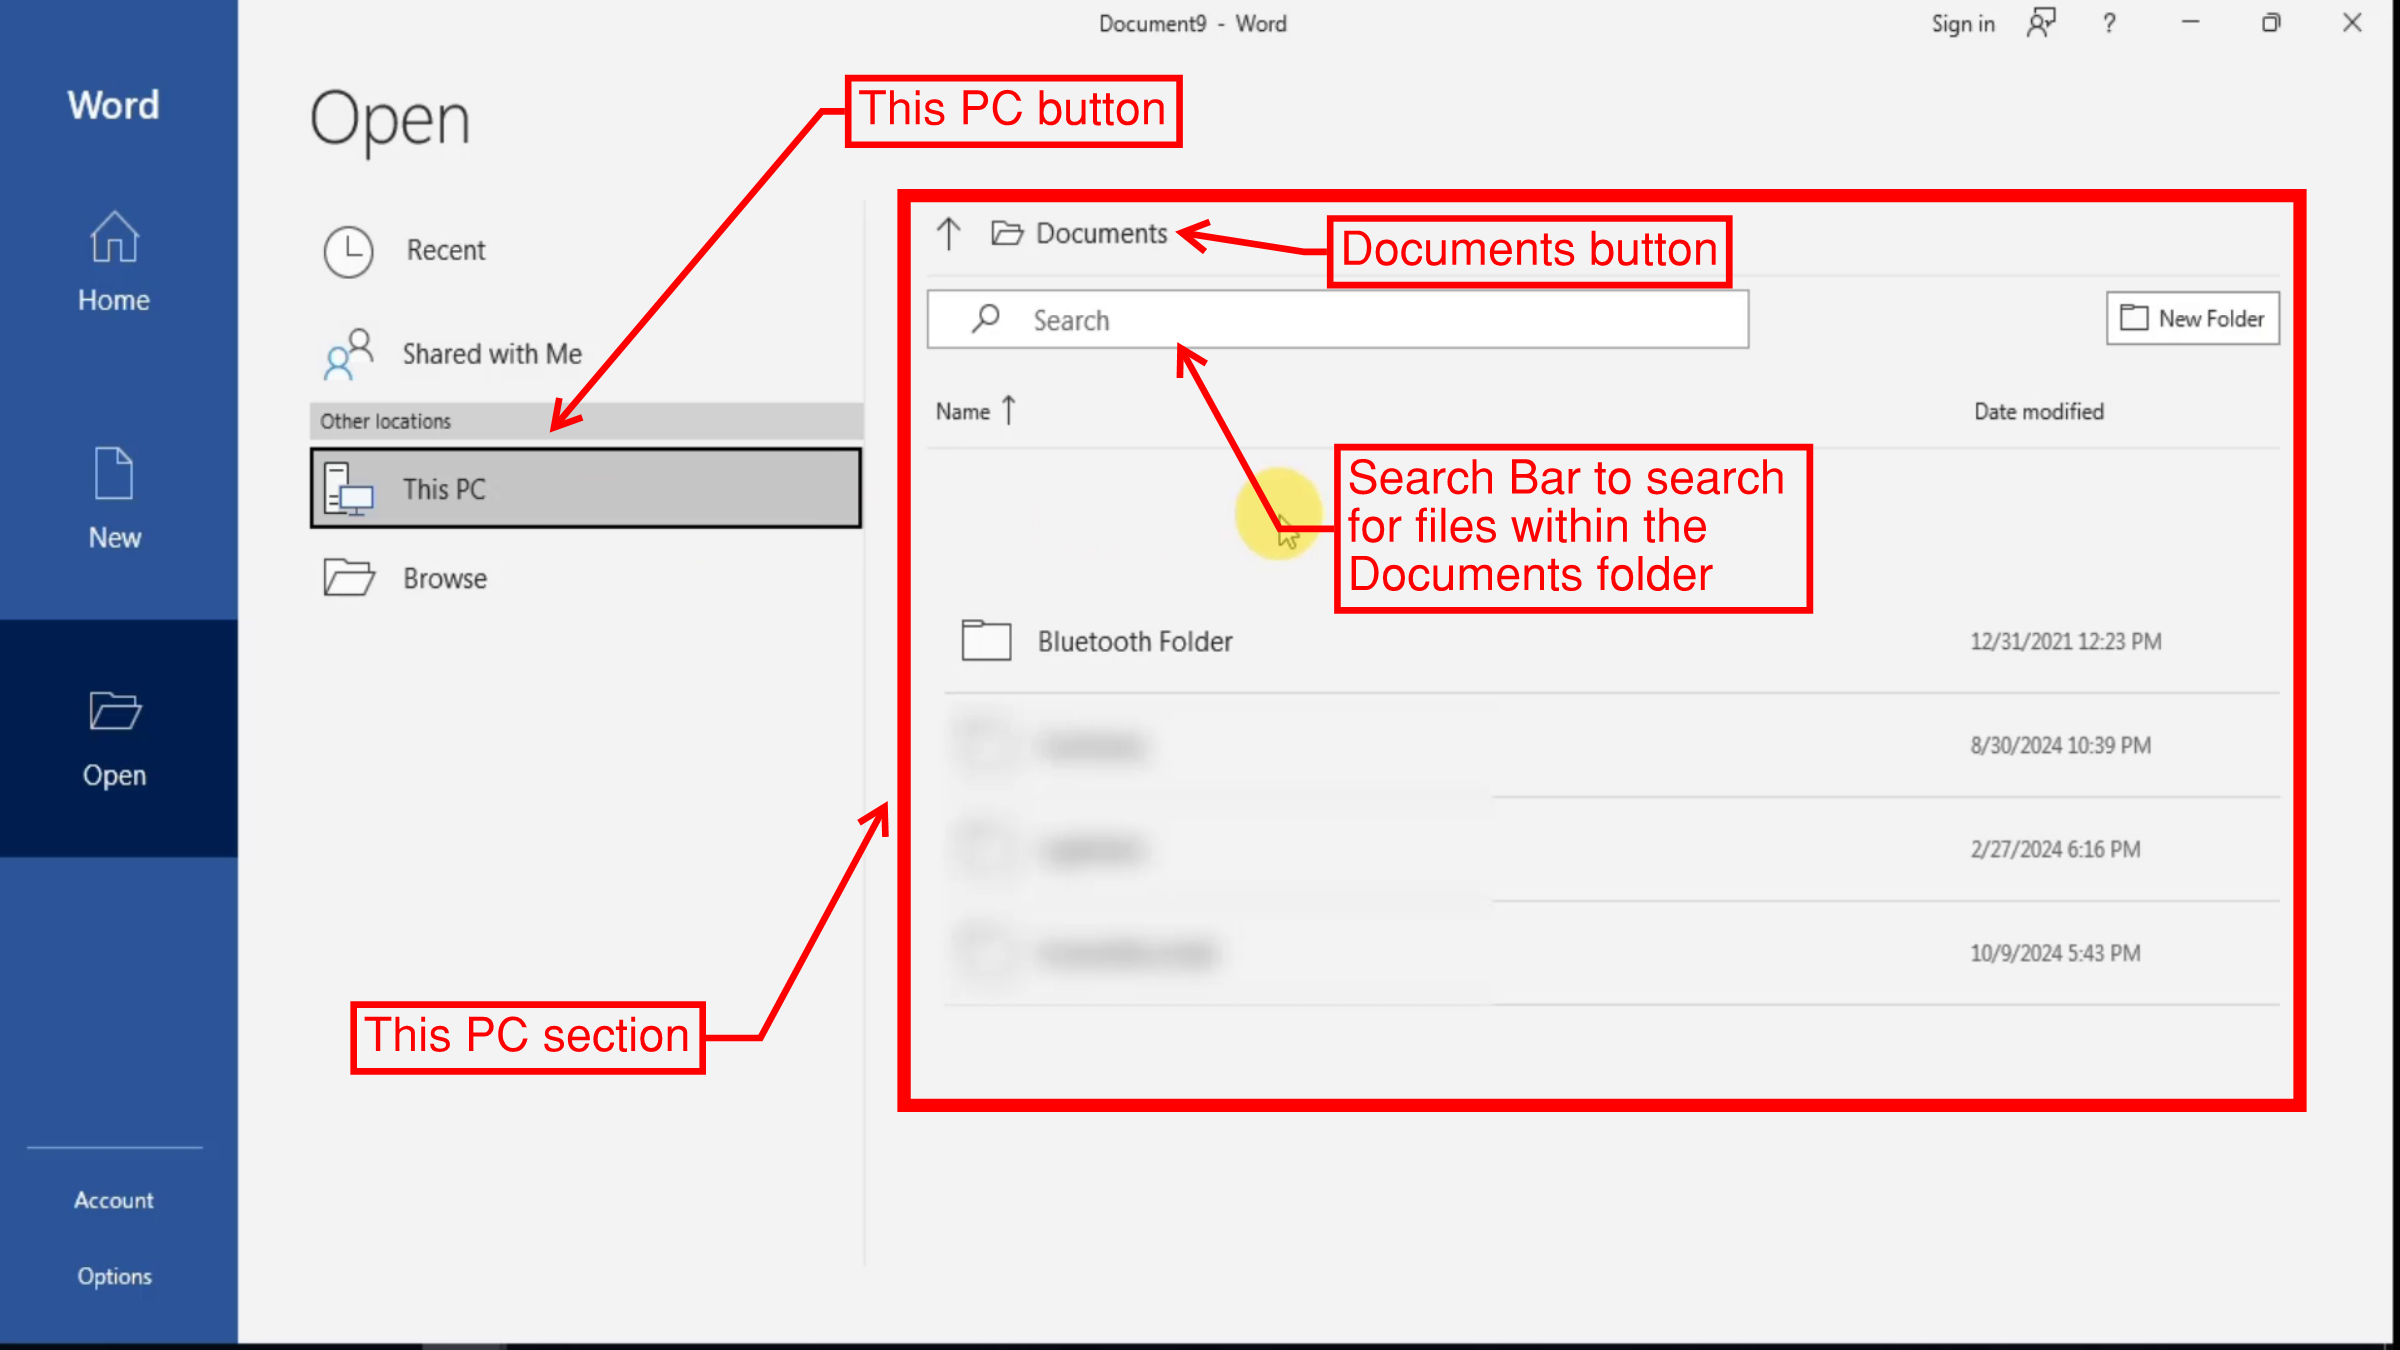 |
Open Screen - This PC section
|
Finally, when we click on the
Browse button, an
Open Dialogue Box appears with which we can browse for the document we want to open.
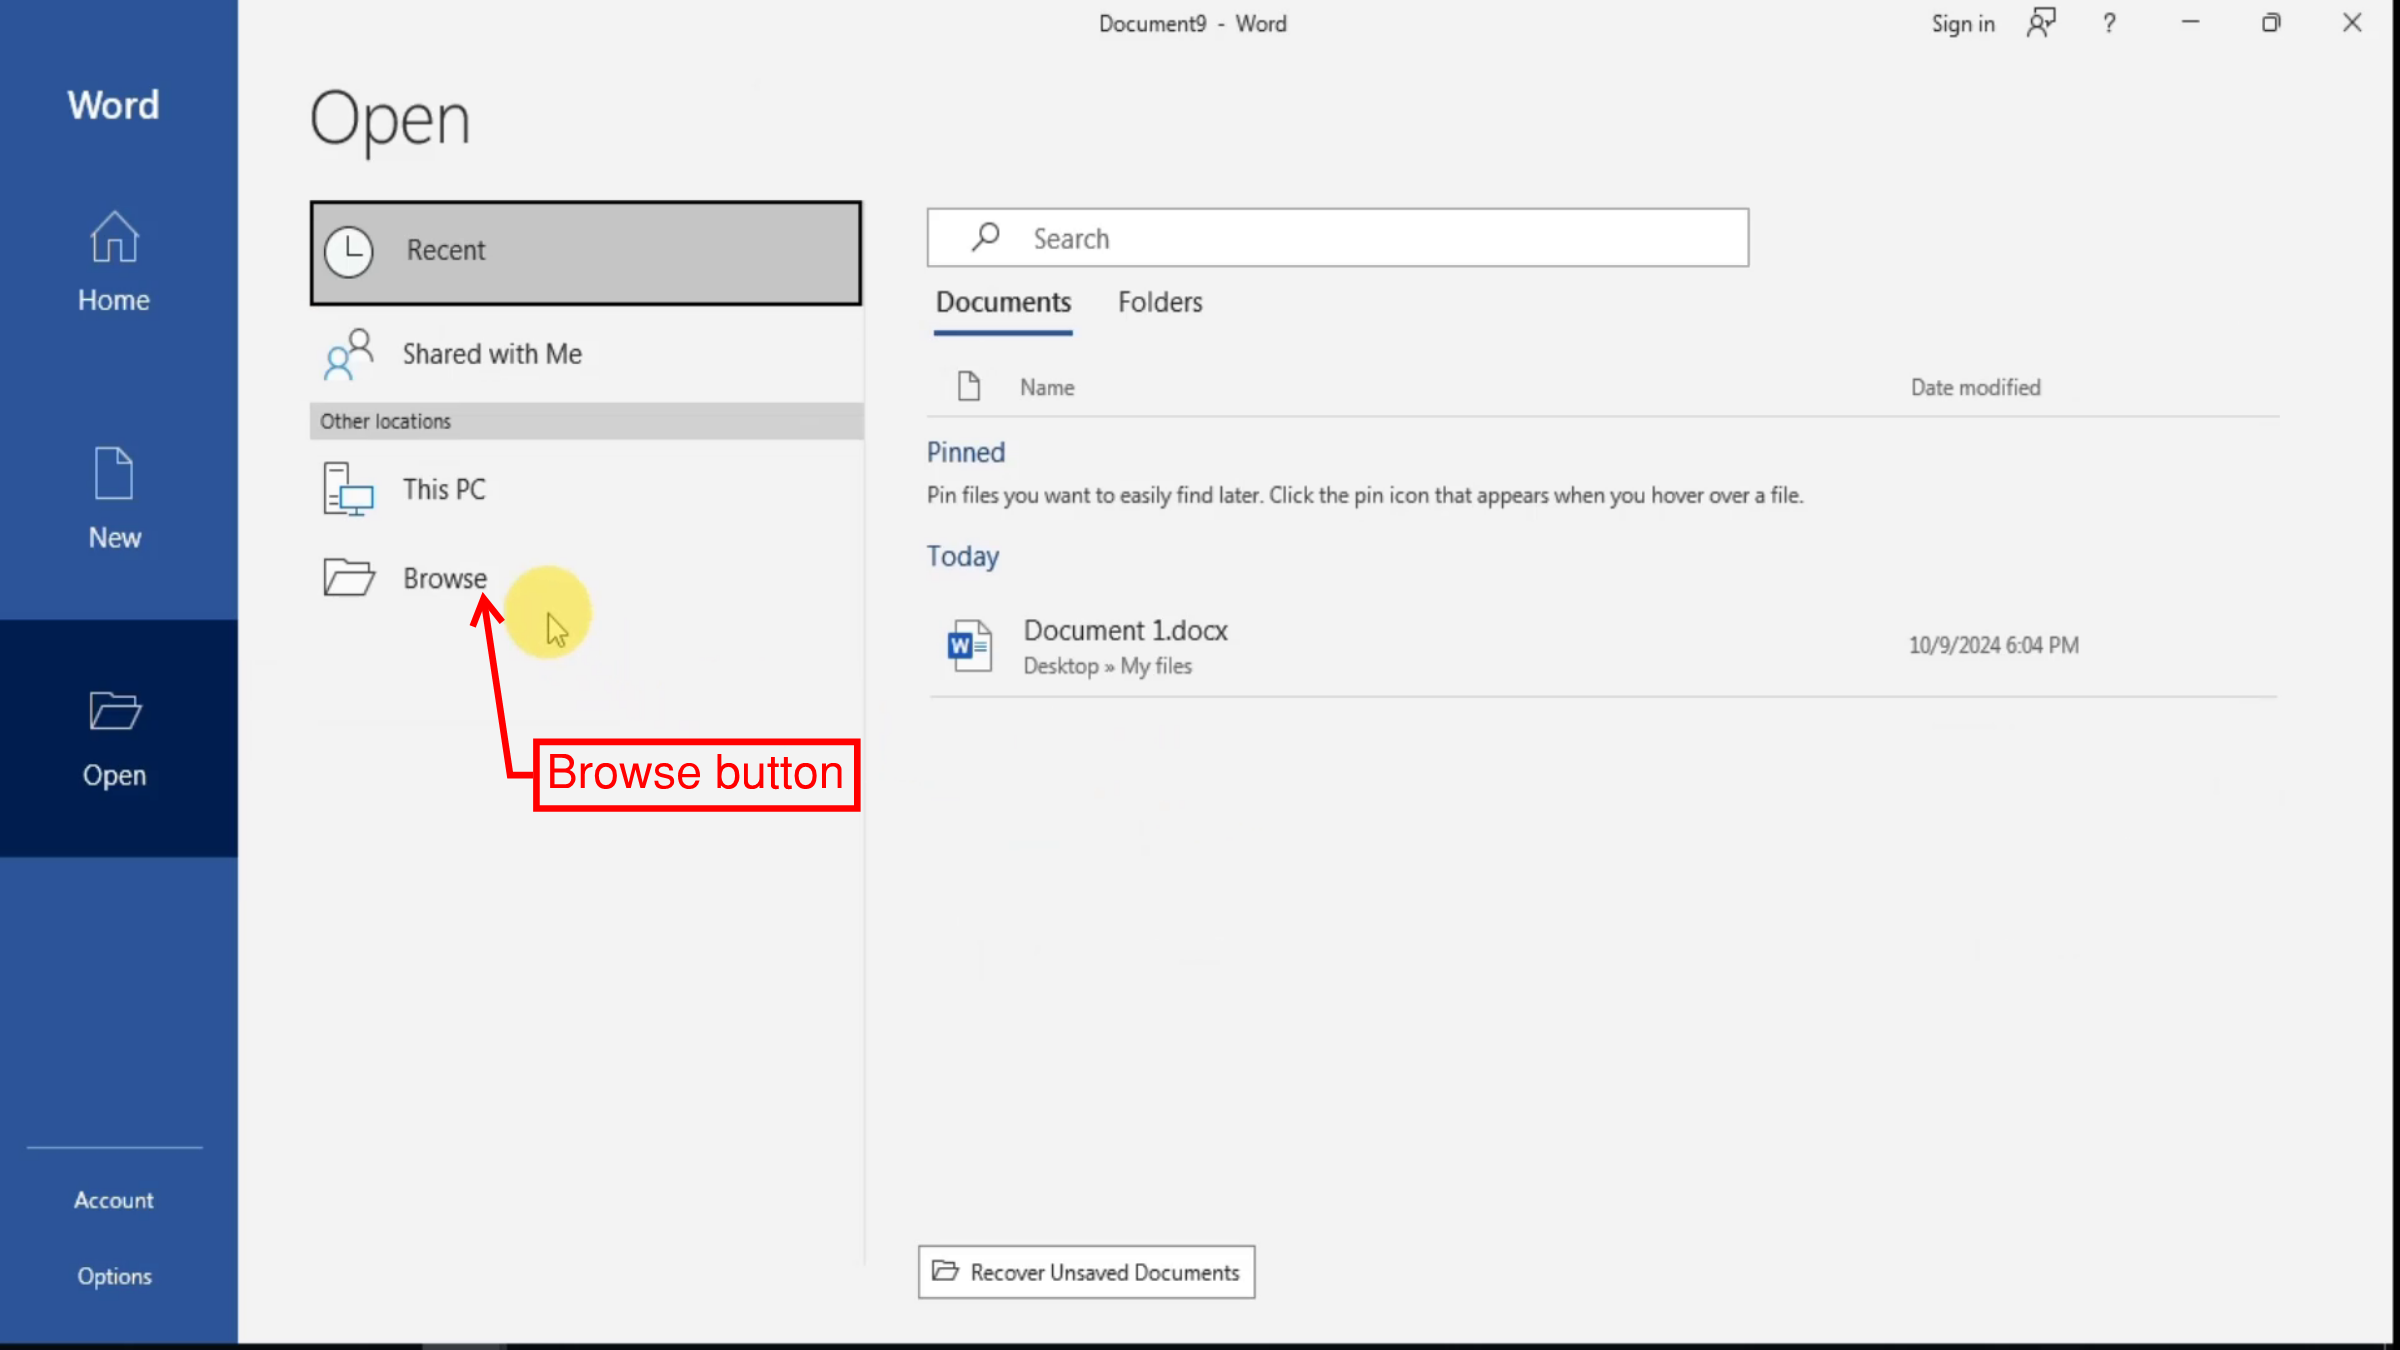 |
| Open Screen - Browse section |
 |
| Open Screen - Browse section - Open Dialogue Box |
The Account Screen
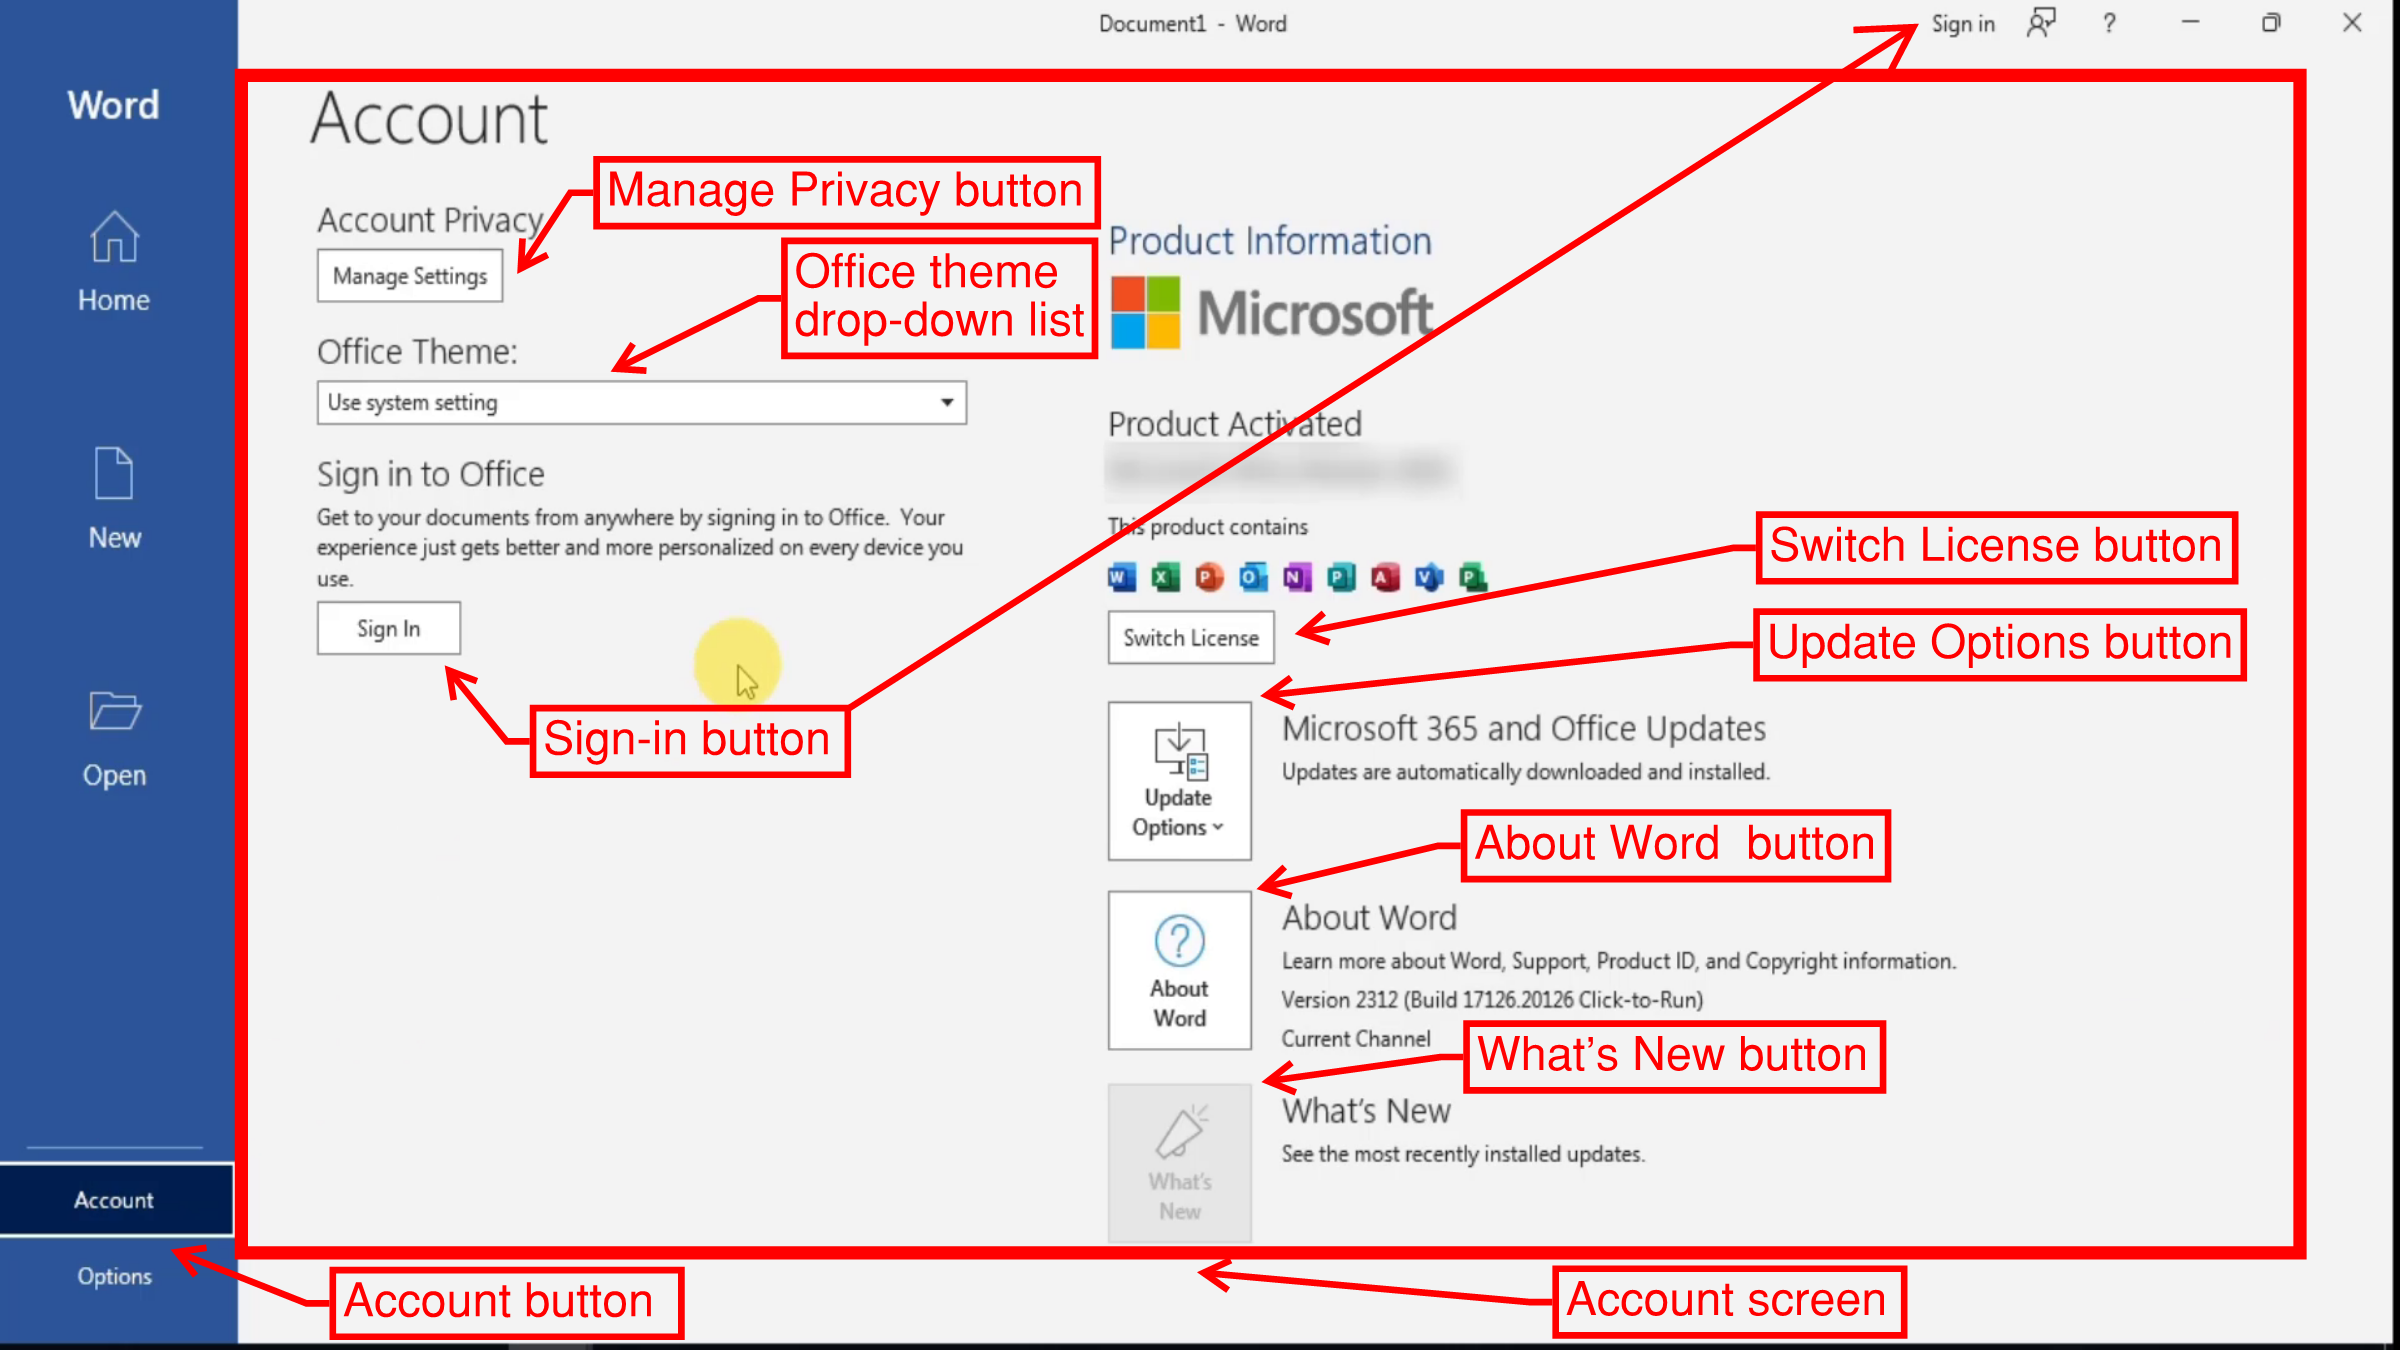
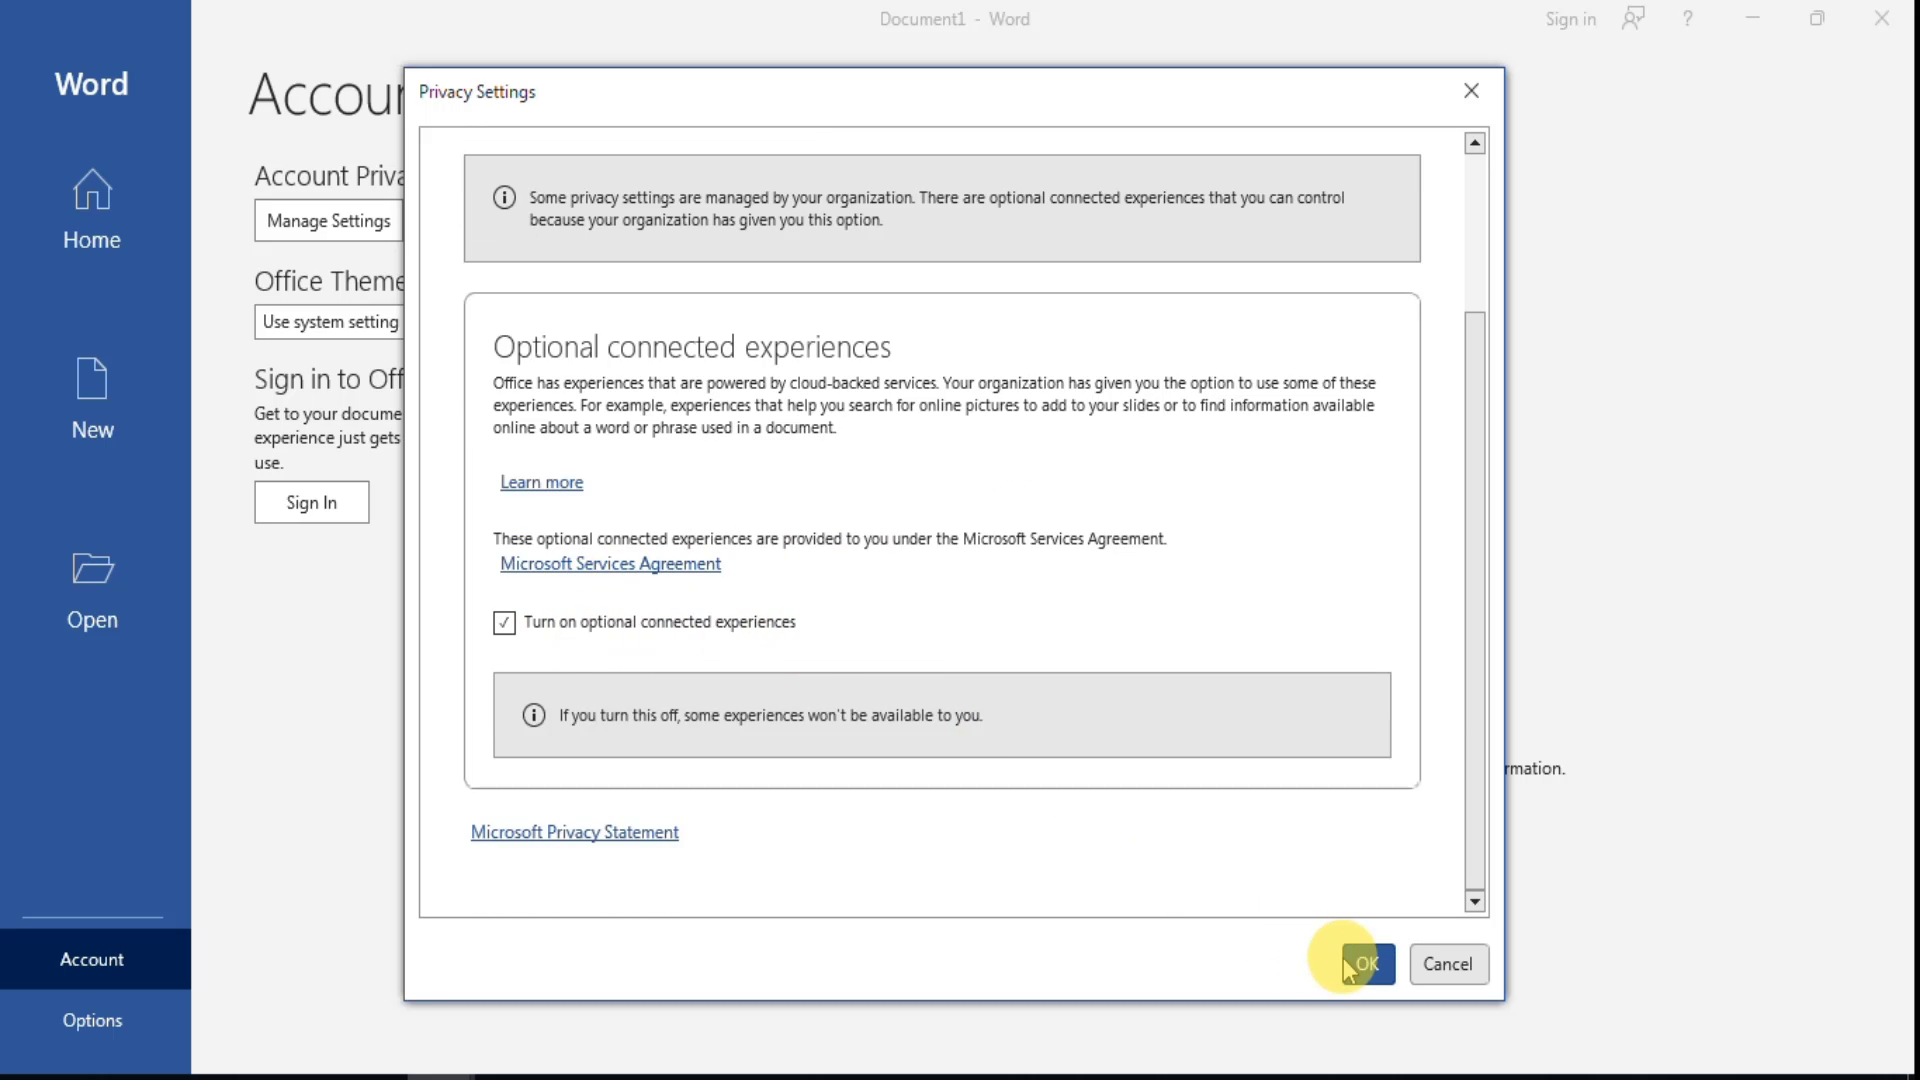
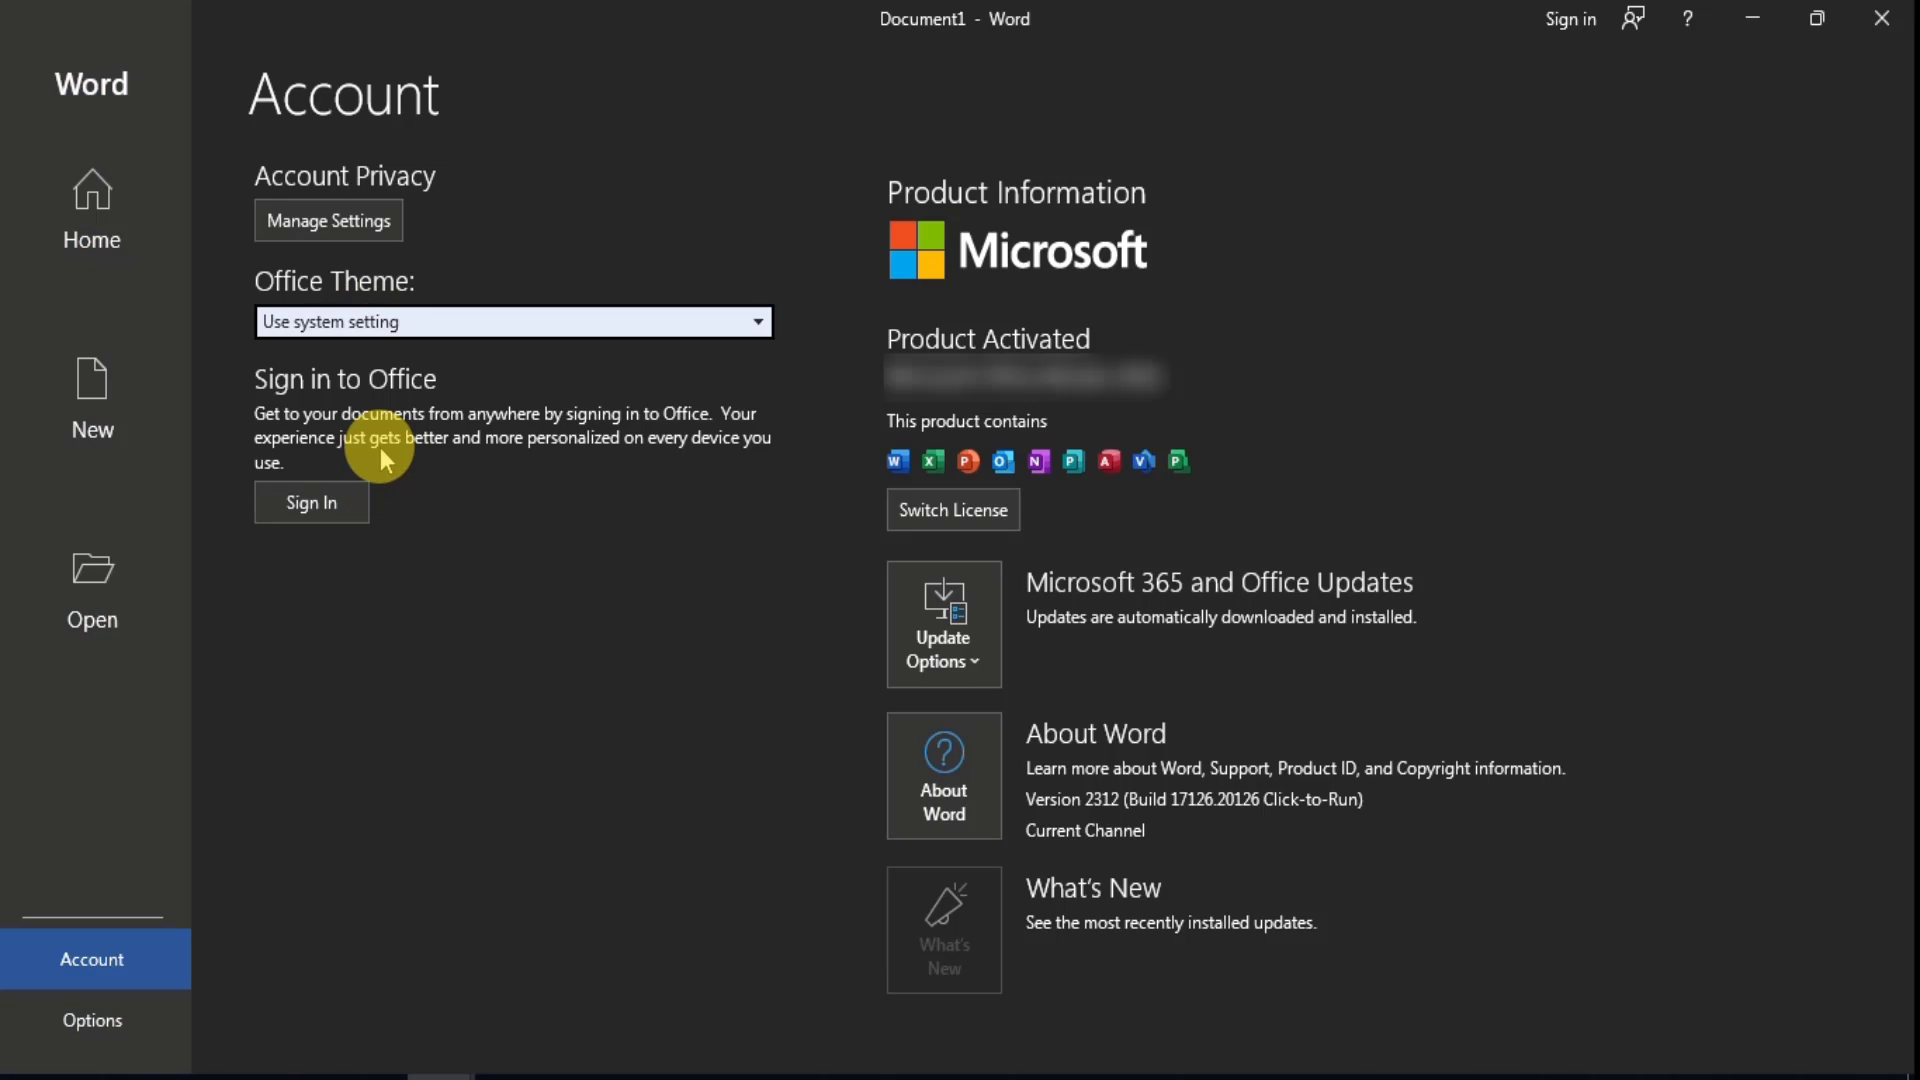
Clicking on Account button takes us to the Account screen. Under Account Privacy, the Manage Privacy button allows us to turn off Connected Experiences. Connected Experiences use our content to suggest and recommend things to us like grammar checks and so on. We may want to disable those experiences if we have privacy concerns. Microsoft Word comes with several themes, and we can select which theme we would like to use from the list shown under Office Theme. We can also sign in to our account in this screen as well as by clicking on the Sign In button on the top right side of the screen. The Product Information section shows us the license we are currently using and the licensed products, and it also allows us to switch license by clicking the Switch License button. The Update Options button provides several options to manage how Microsoft Office gets updated:
- Update Now checks and updates Microsoft Office instantly
- Disable Update disables the automatic check and installation of updates
- View Updates takes us to a webpage from Microsoft that gives us more info about updates.
- About Updates shows a bit of information about updates.
Clicking the About Word button shows info like our current Microsoft Office version and so on. Clicking the What’s New button shows us info about the latest updates.
 |
| Account screen |
 |
| Privacy Settings - Connected Experiences |
 |
| Office theme changed |
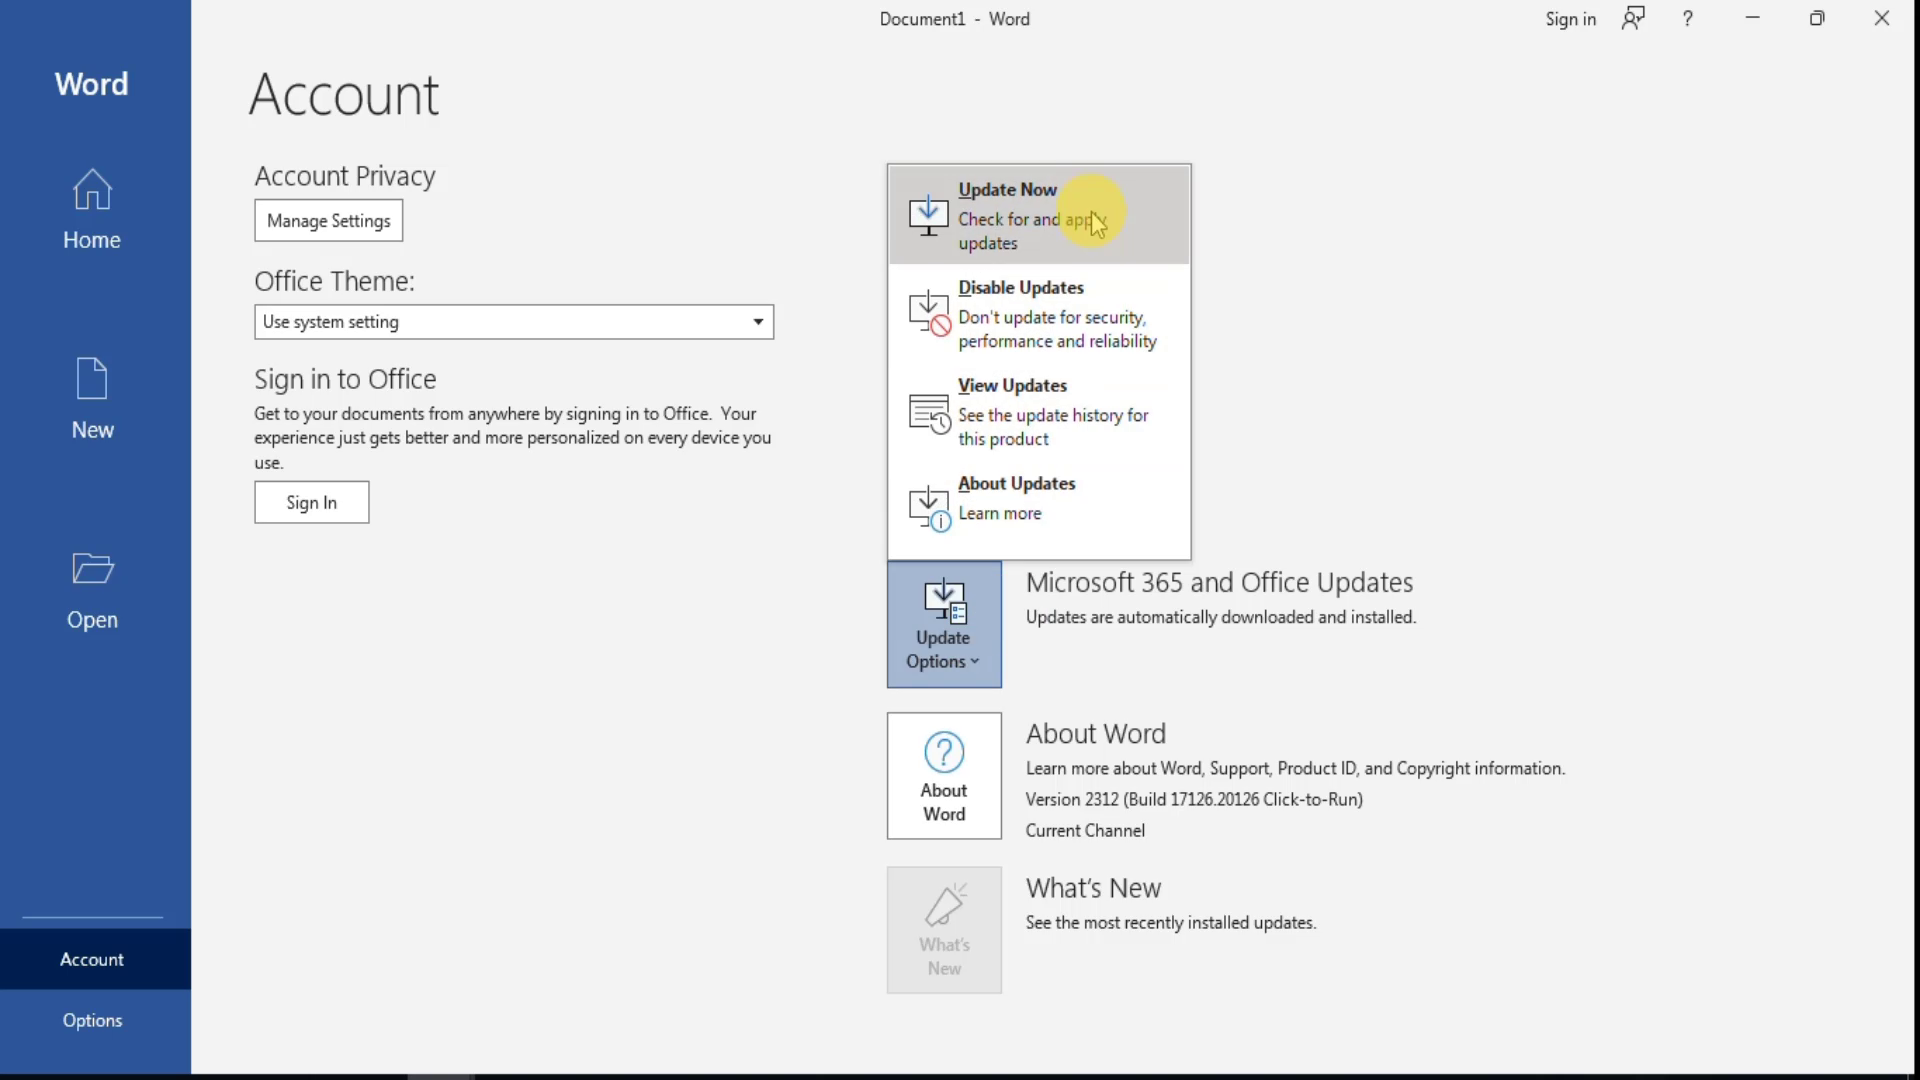 |
| Update Options button option |
The Options Screen
Clicking on the Options button opens the Word Options window.
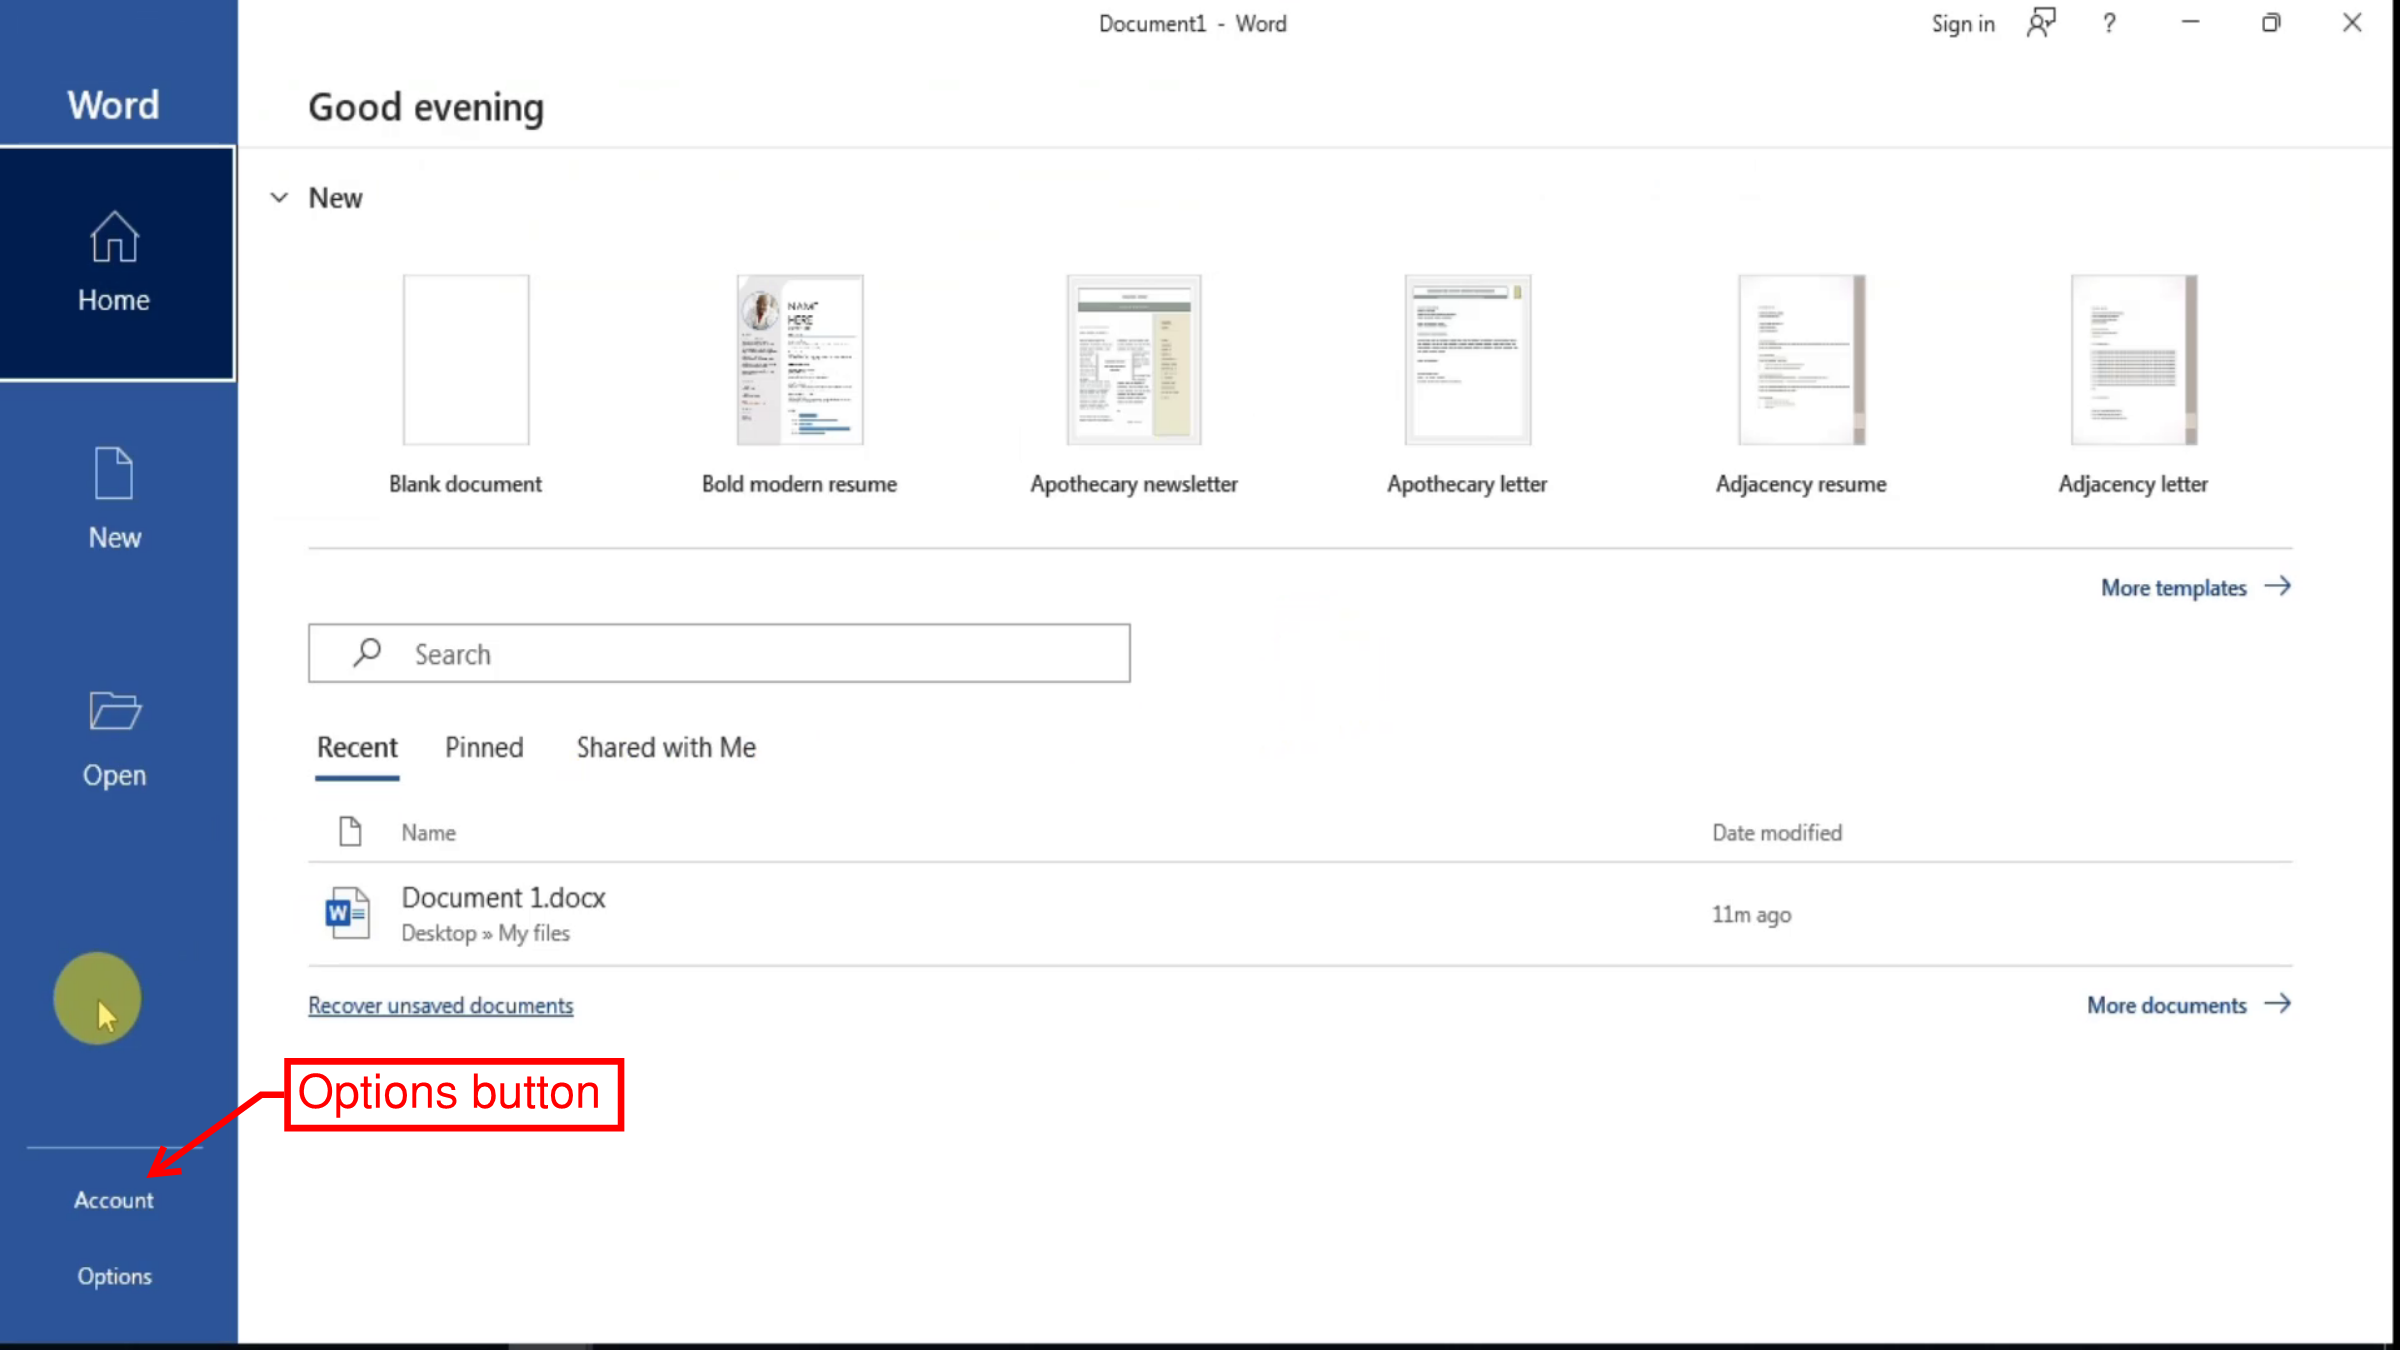 |
| Options button |
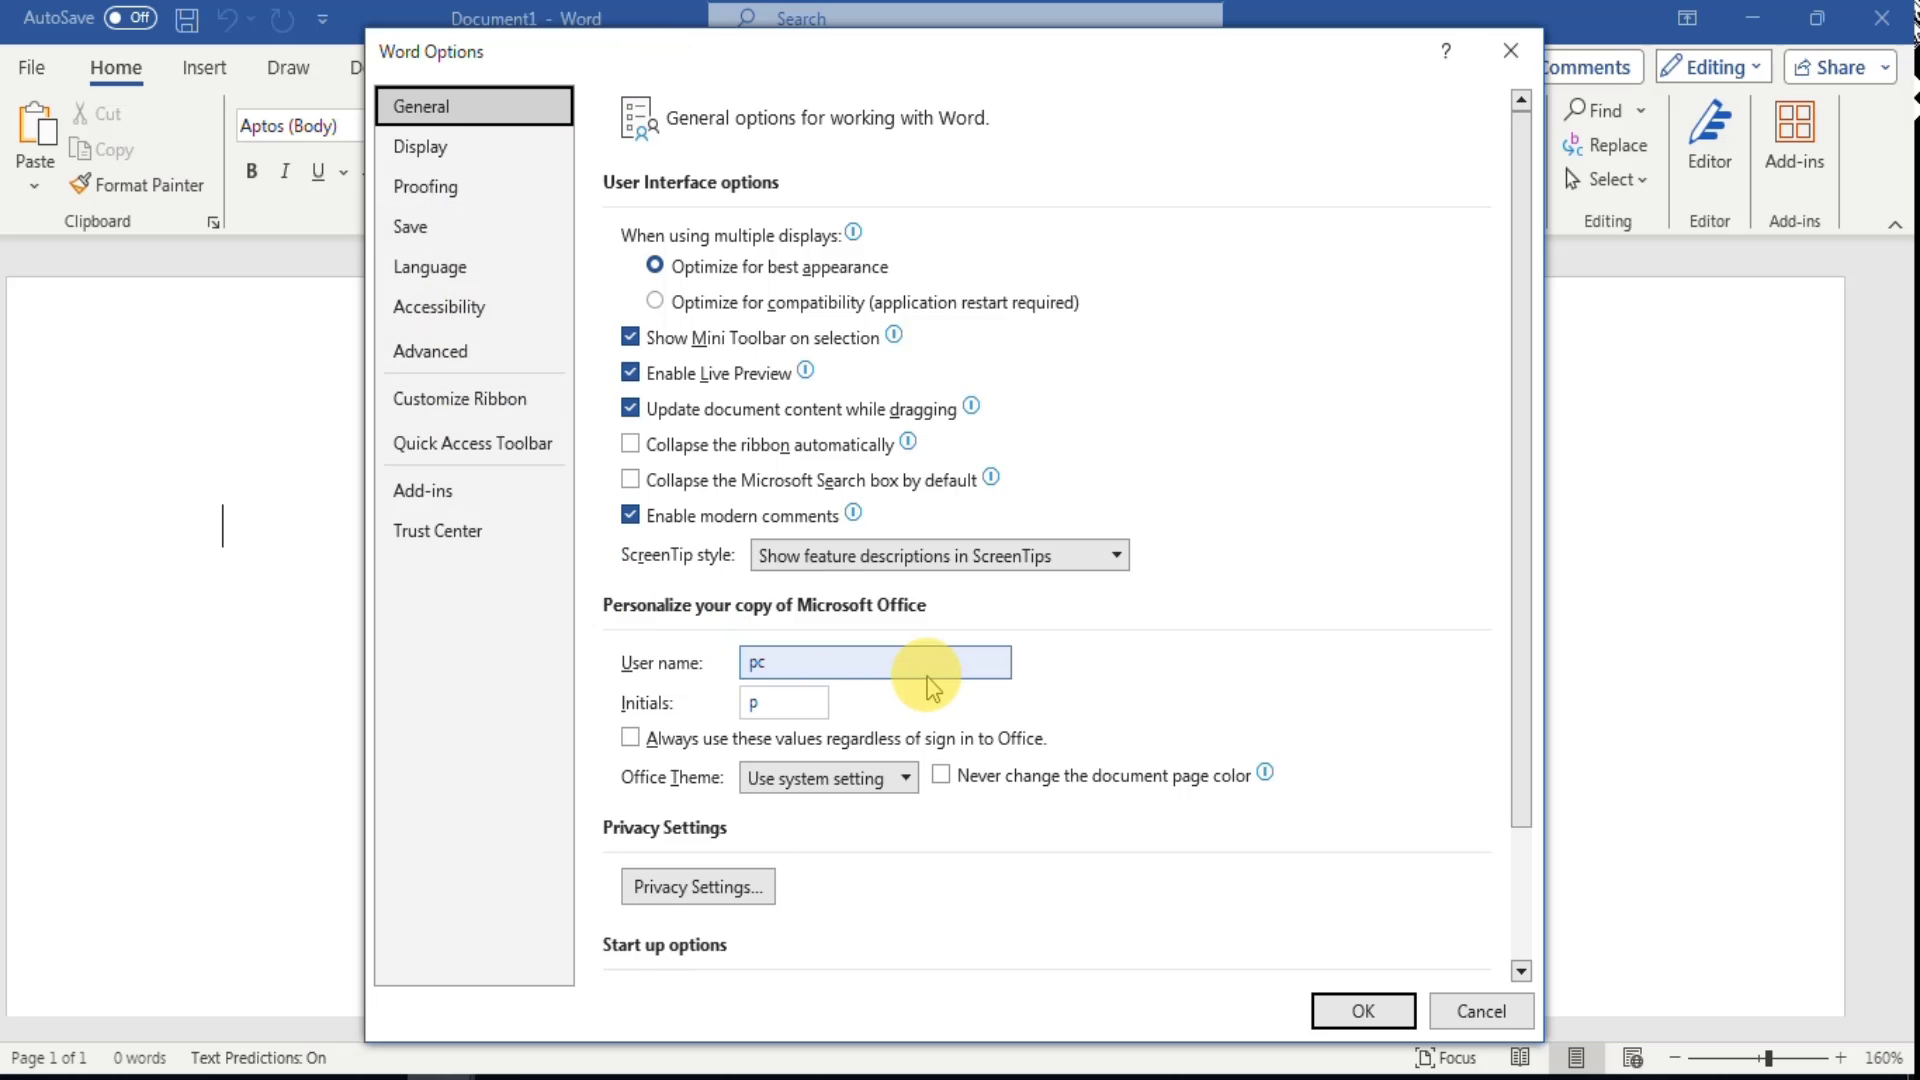 |
| Word Options window |
Elements that appear in all the screens
We have mentioned before the Sign in button that allows us to log in to our account. To share feedback with Microsoft, click on the Help improve office? button. To
search for help online, click on the Microsoft Word Help button, or
press F1.
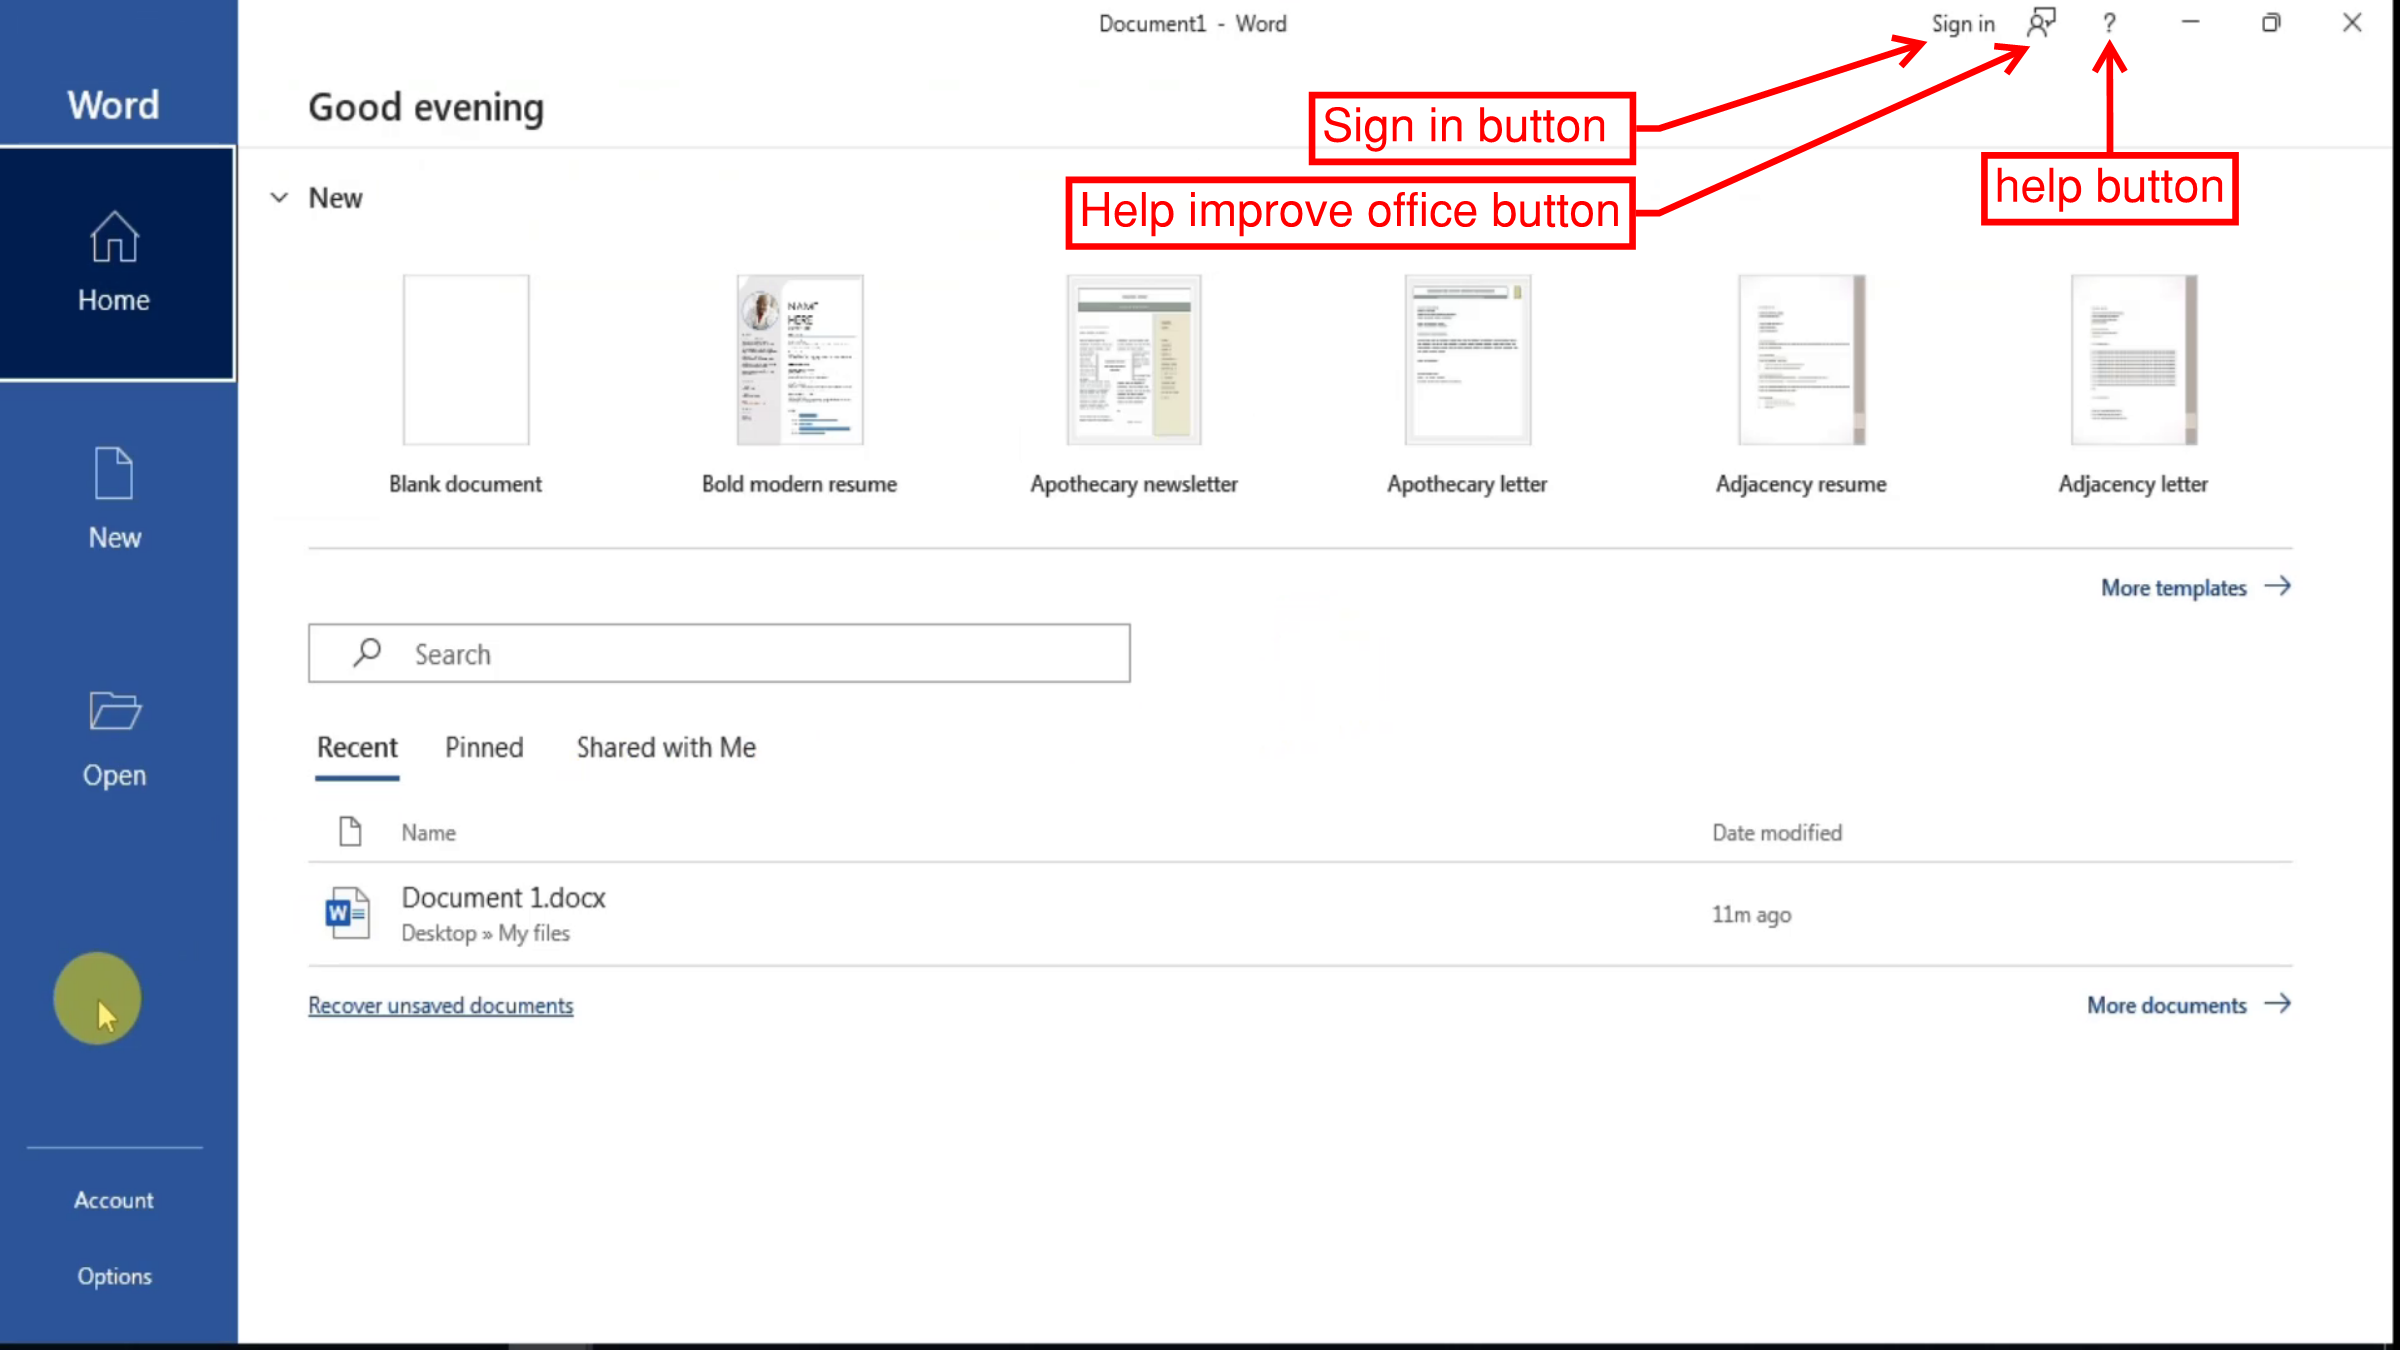 |
Elements that appear in all the screens
|
Conclusion
In conclusion, the Microsoft Word Start Screen serves as a powerful gateway to productivity and creativity. By familiarizing yourself with its various features, you can streamline your workflow and enhance your writing experience. Don’t forget to explore other blog posts for more tutorials and insights to help you make the most of Microsoft Word’s features. Until next time!


